Posted on: 18 October 2025
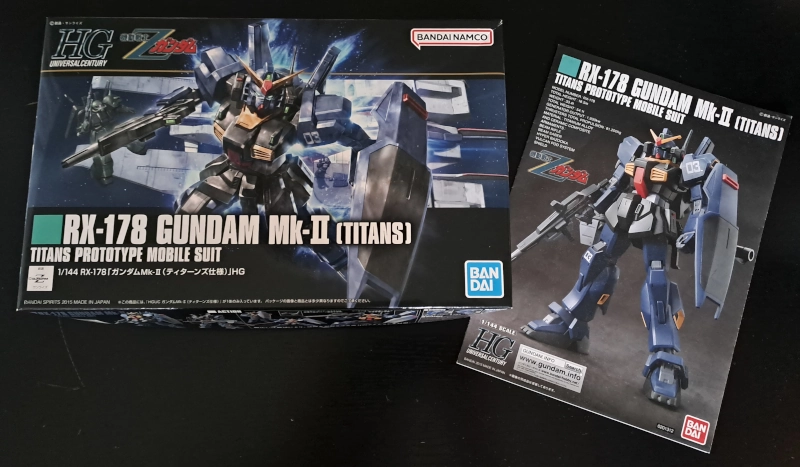
Model information
| Model | RX-178 Mk.II |
| Scale | 1/144 |
| Series | Mobile Suit Zeta Gundam |
| Manufacturer | Bandai Spirits |
| Release year | 2019 |
| Kit number | 5057985 |
Purchase information
| Date | 19 October 2024 |
| Price | €10,00 |
| Store | Side7 |
| Venue | SMC (Scale Model Challenge) 2024 |
| Location | Veldhoven, Netherlands |
About the model

Zeta Gundam anime
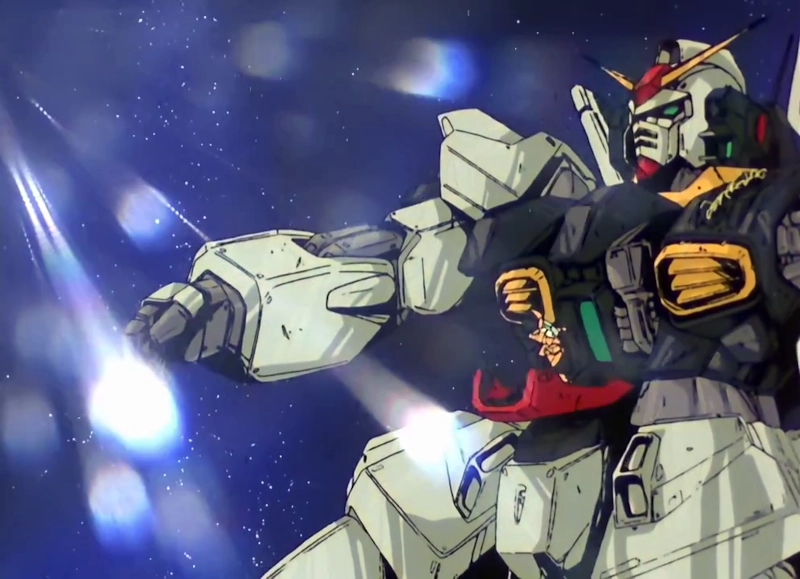
This mobile suit appears in the 1985 anime series “Mobile Suit Zeta Gundam”. It is created by the Titans, a special forces group within the Earth Federation Forces created to deal with Zeon remnants following events in the 1991 OVA “Mobile Suit Gundam 0083: Stardust Memory”.

The RX-178 mark II was created based of the iconic RX-78-2 and three prototypes were created. At the beginning of the series, two of these prototypes were stolen by the Anti Earth Union Group (A.E.U.G.). This faction was created to reform the corrupt Earth Federation and became focussed on fighting the Titans. The last prototype was brought to the A.E.U.G. by Emma Sheen, a defected Titans pilot.

Two of the prototypes were disassembled and the remaining RX-178 mk.II is repainted white and would become the primary suit used by the main character Kamille Bidan, until the Zeta Gundam is introduced. By then, the mark II will be piloted by Emma Sheen.

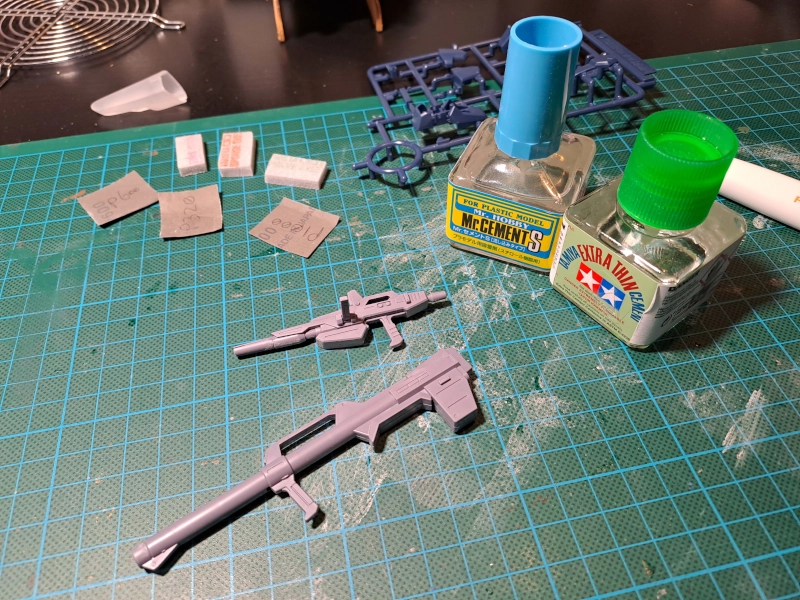
Parts preparation
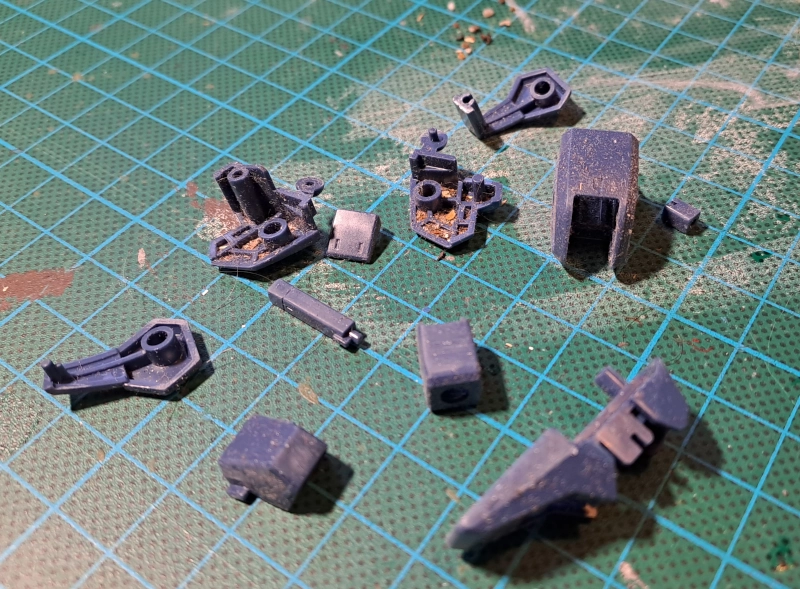
I used to keep parts in plastic sandwich bags, a cheap solution to keeping parts organized. But when I was cleaning, I accidently sucked up one of the bags with the vaccuum cleaner… The plastic bag was torn and all the parts were scattered inside the cleaner’s bag. Luckily I was able to retrieve all the parts, clean and fix them.

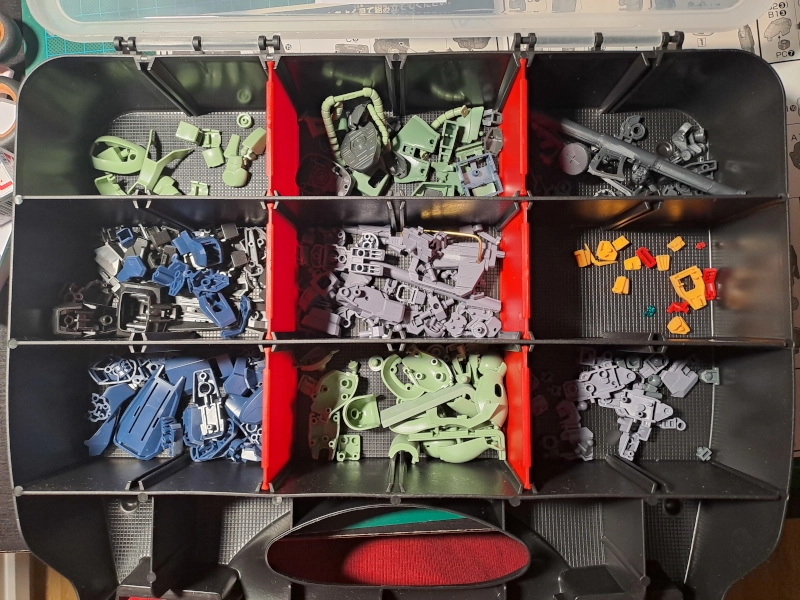
Because keeping parts in plastic sandwich bags was not ideal, I bought a little organizer. I was also building a HGUC Zaku II at the time.

Modifications
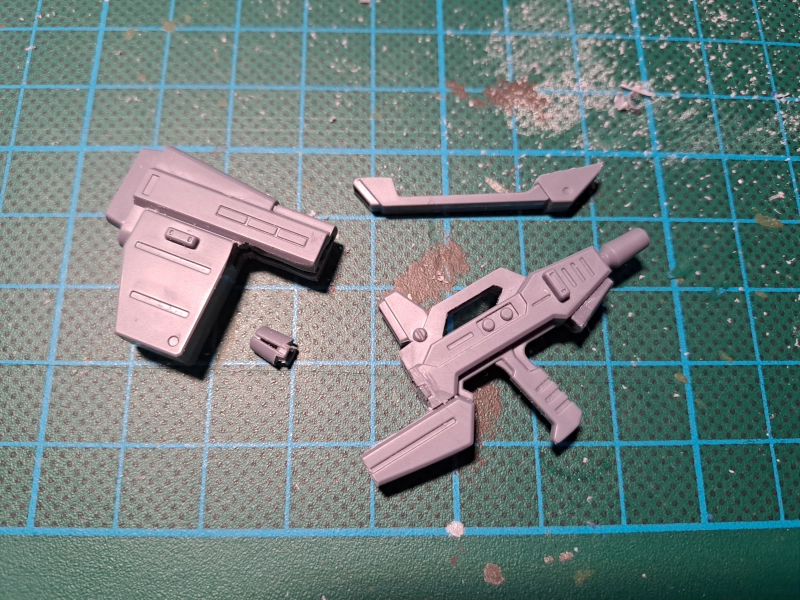
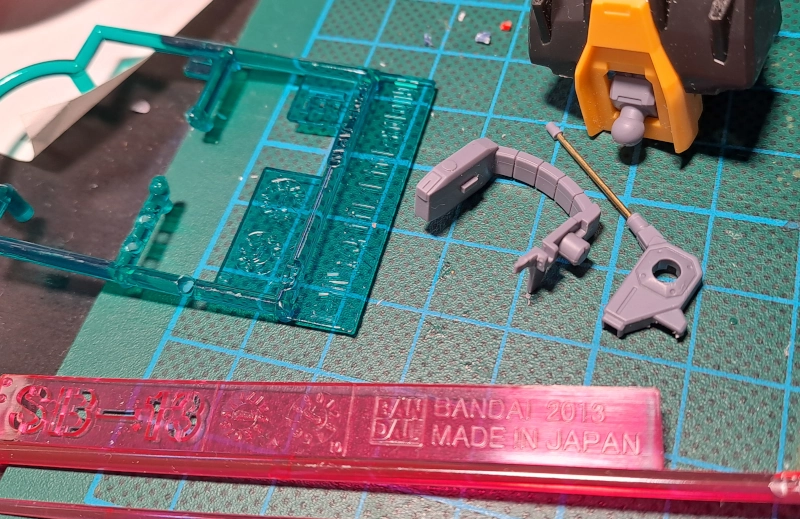
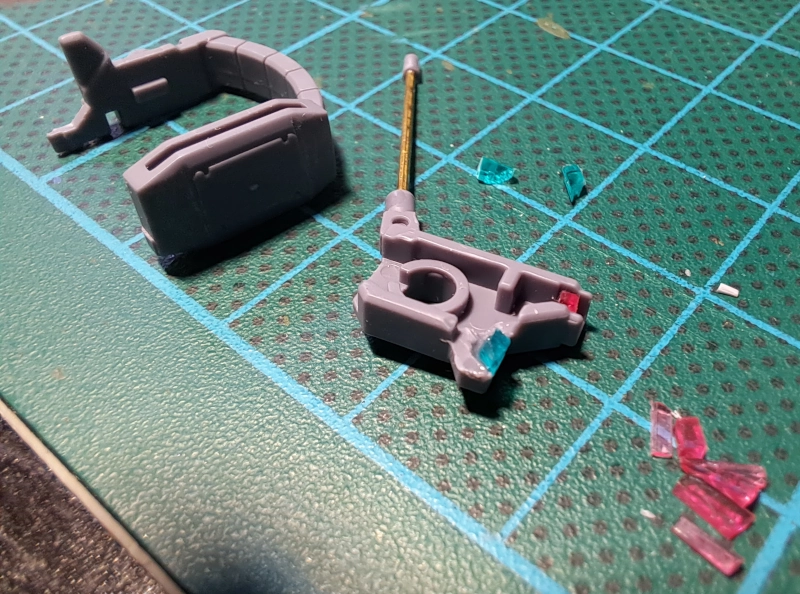
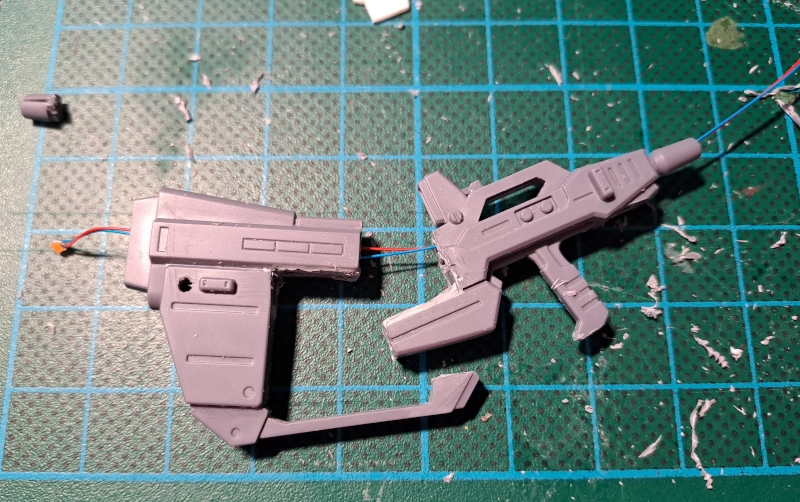
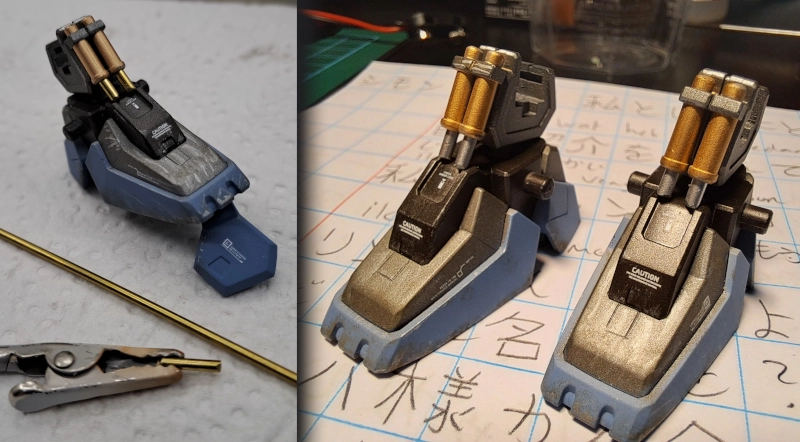
Weapon
The rifle was modified, I wanted to try if I could create a more heavy looking blaster. I cut off the rear of the missle launcher and used that as the front of beam rifle and added some bars to make it a little wider. It worked out rather well, I have not seen this done before, so it looks unique to me.


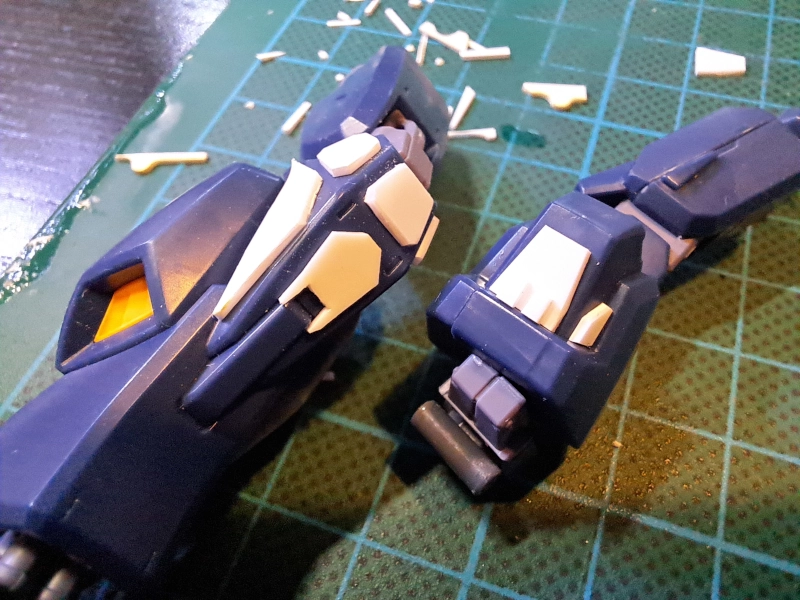
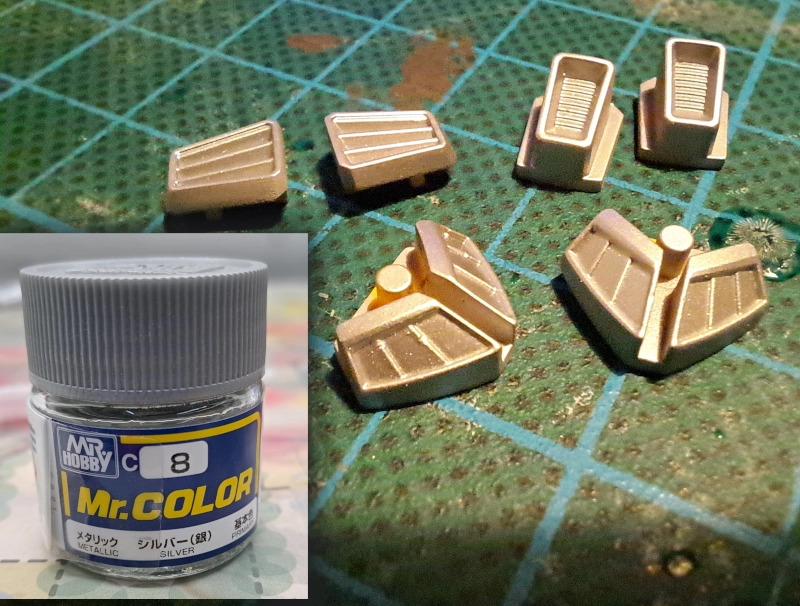
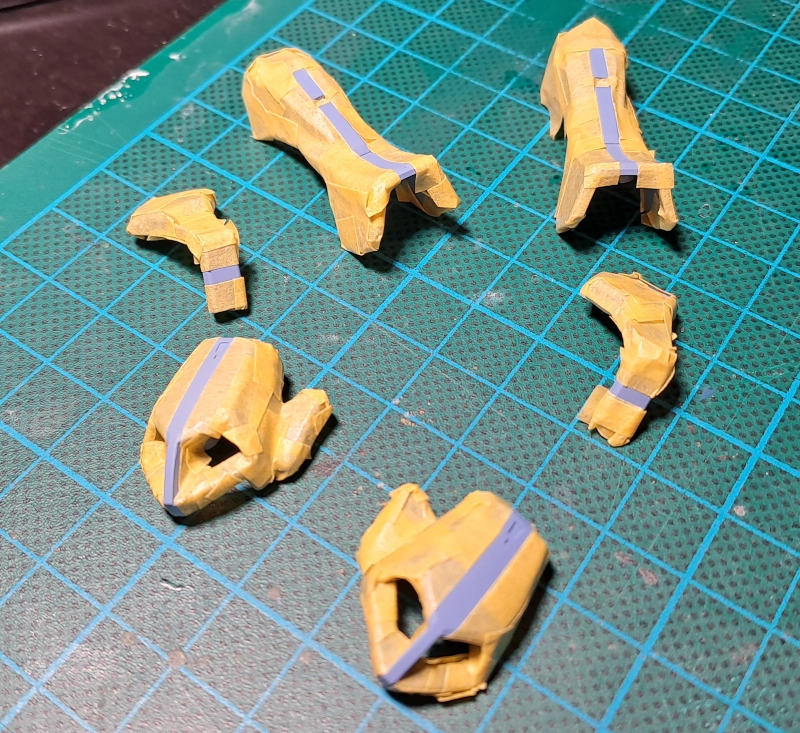
Armour plates
For a bit more detail, I added some armour plating by cutting pieces of bread clips.


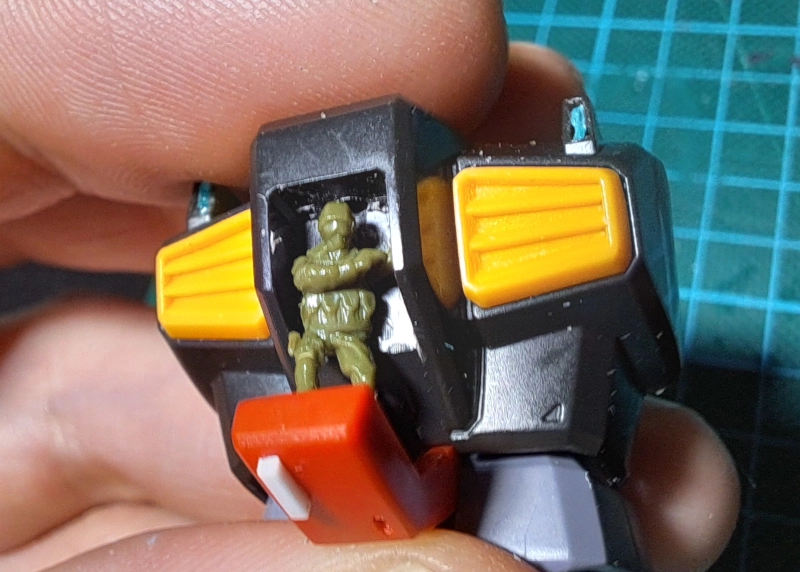
Pilot
During my last visit to Japan I found some 1/150 scale soldiers at Seria for 100 Yen. I added one to the cockpit and two to the diorama. I had to cut away some plastic and also added a hole for another LED here as well. These little guys really help uplift the actual size of the Gundam.

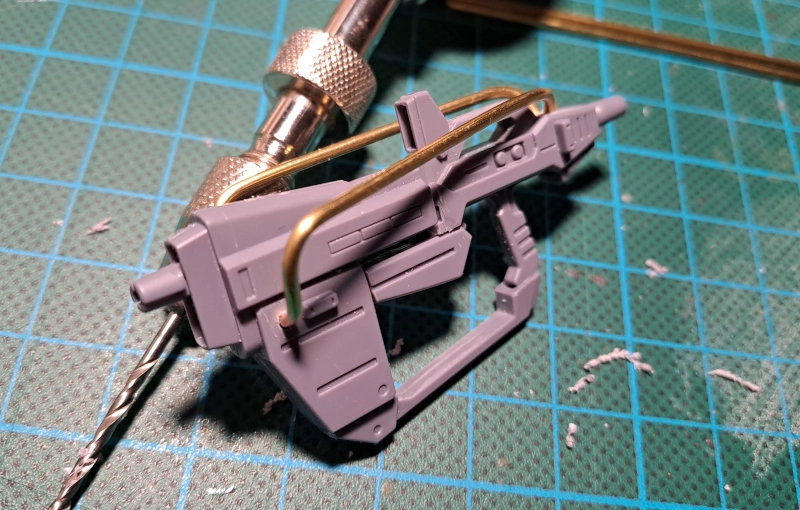
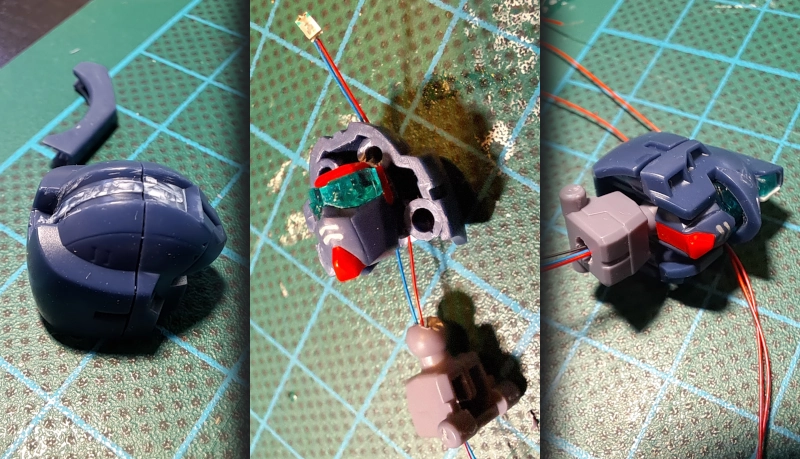
Light spots
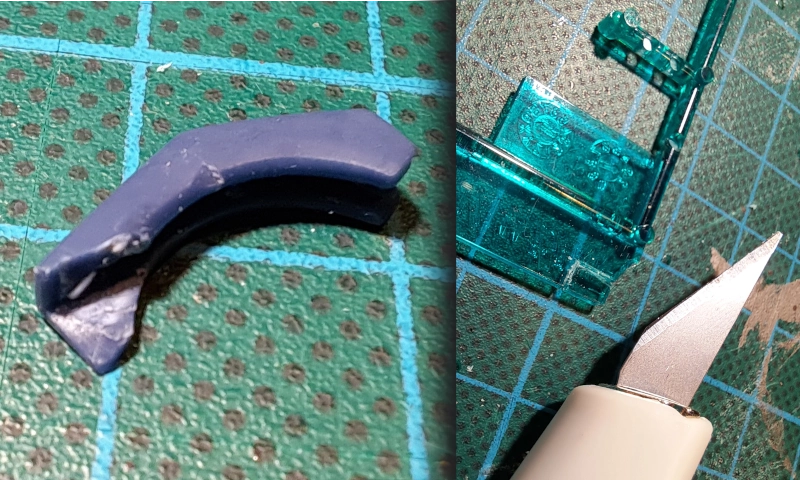
There are several areas on the Gundam where I wanted to add small light emitting diodes. But in order to do so, I would have to make sure some parts would become transparent to let the light through.
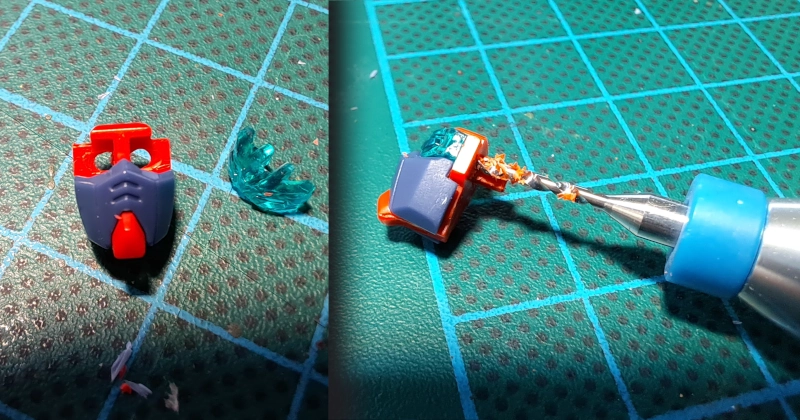
The camera on top of its head would make a nice spot for a light. I cut a snippet off the transparent sprue and then fixed the part again with a piece of bread clip and some putty.


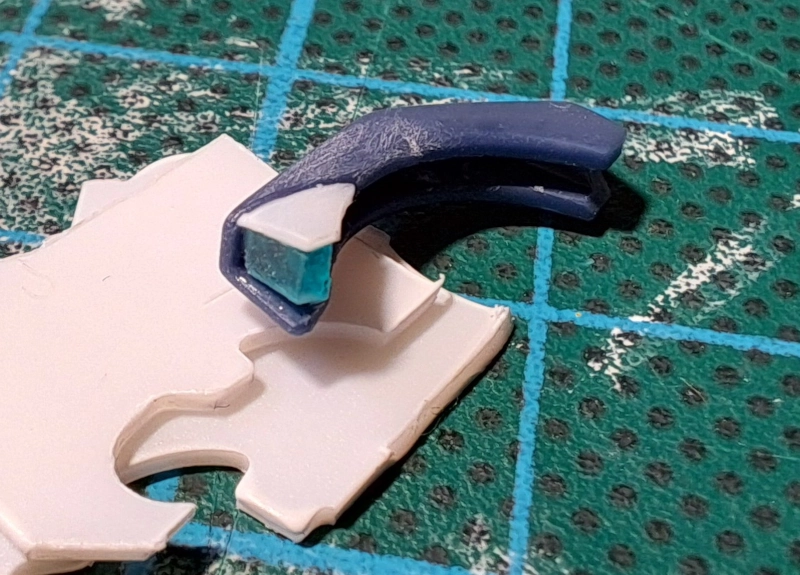
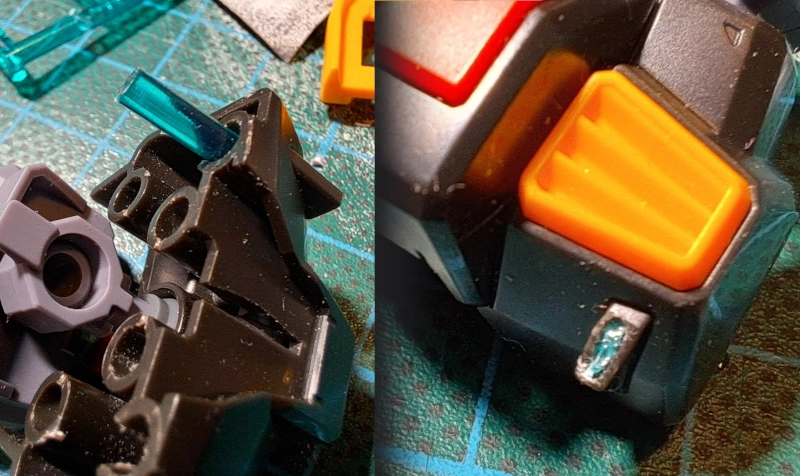
On its head, there is a device that looks a bit like headphones, but is actually a vulcan gun and ammo drum. I do not really understand why this weapon needed an antenna, but thought it looked more like a communications device anyway, so I extended the antenna. I also replaced the fronts with pieces of transparent plastic.


On the chest there are also two cameras, but I made two mistakes here. First, I cut the slivers of transparent plastic too thin and it simply does not look nice. Second, I thought it would be a good idea to slide a rod of the sprue inside the chest to let it conduct light. But this actually diffused the light so much it was not usable and I could no longer get the rod out. It also did not line up perfectly, so it would not have worked anyway. In the end, I just put the included stickers over these parts. Maybe next time I can do better at these.

The head piece allowed me to easily drill two holes for the eyes.

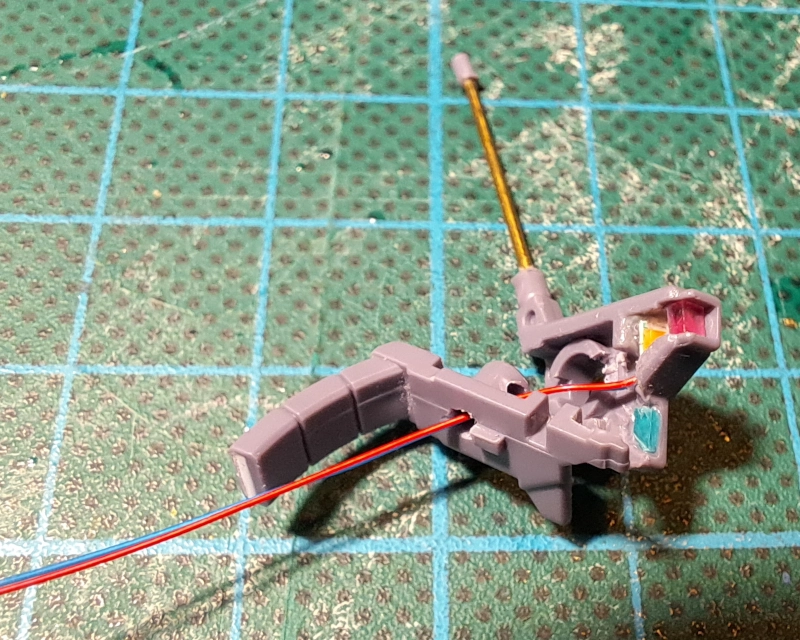
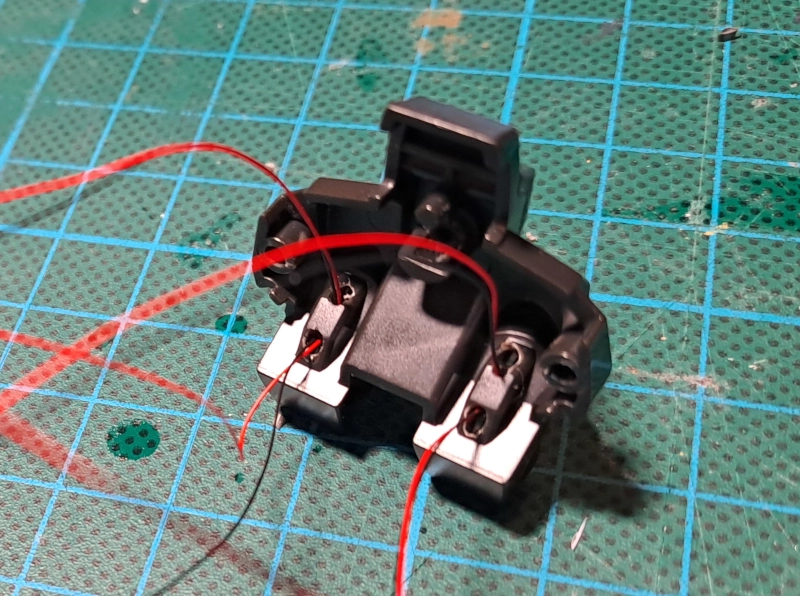
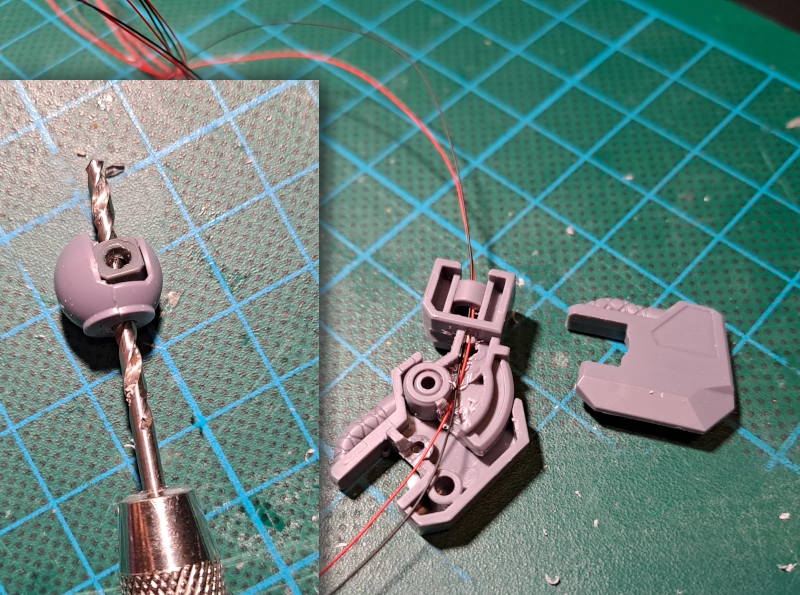
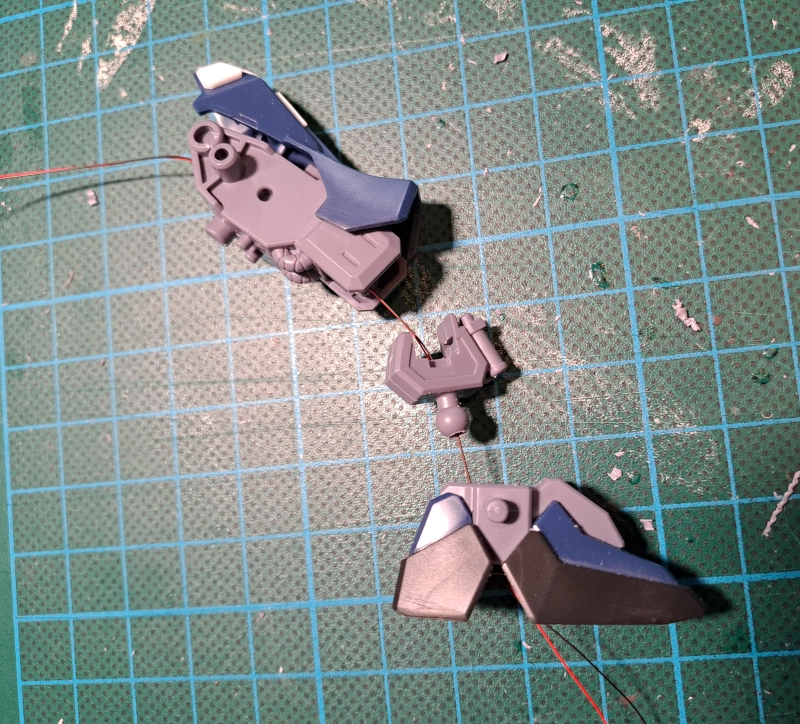
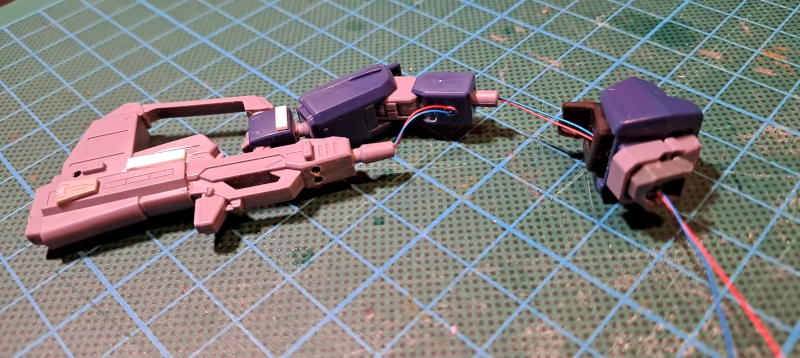
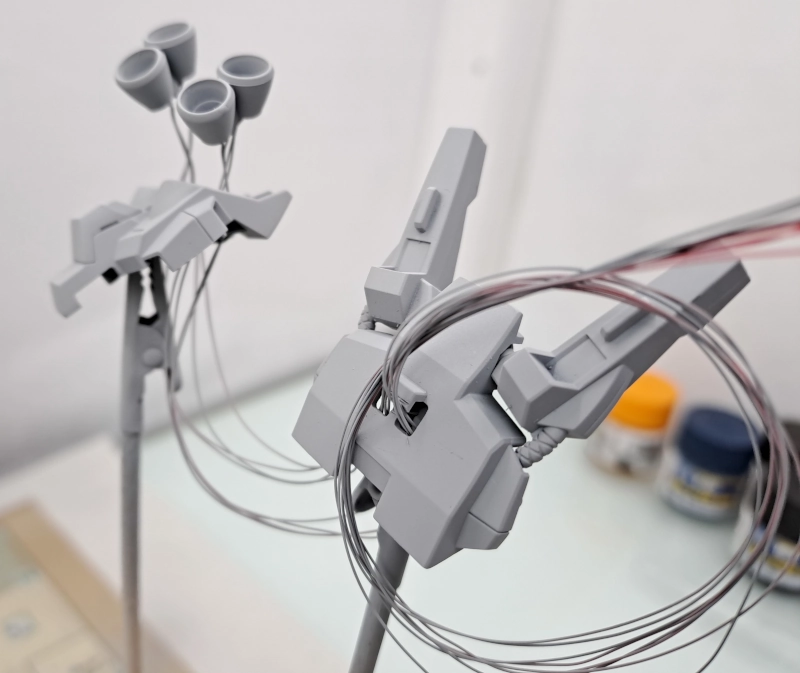
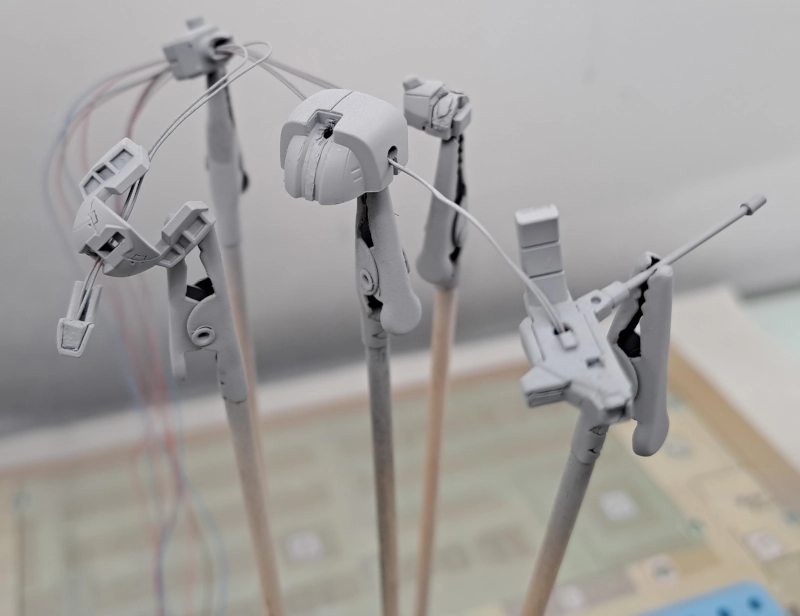
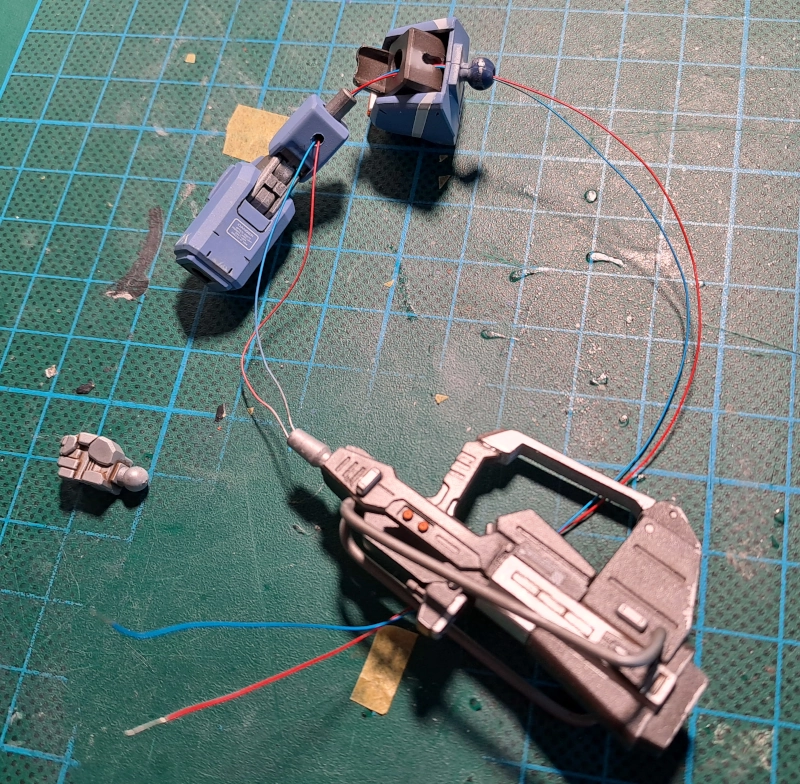
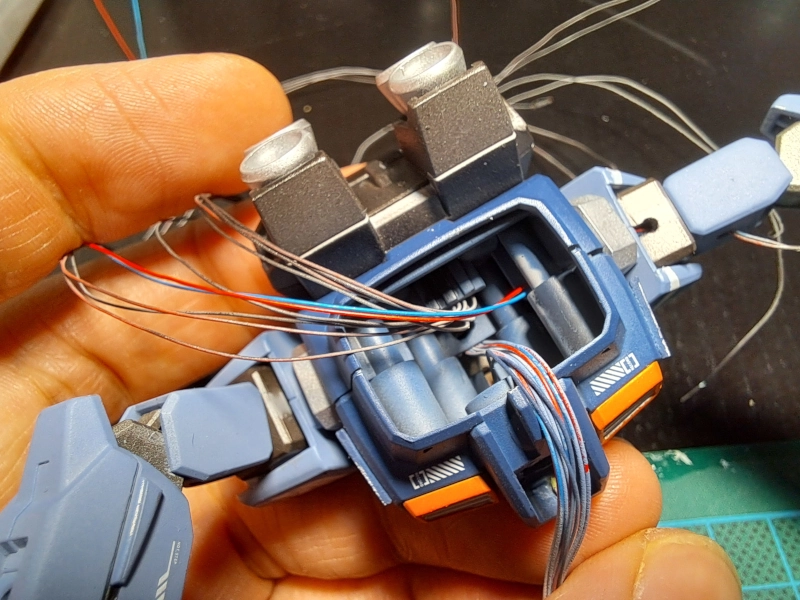
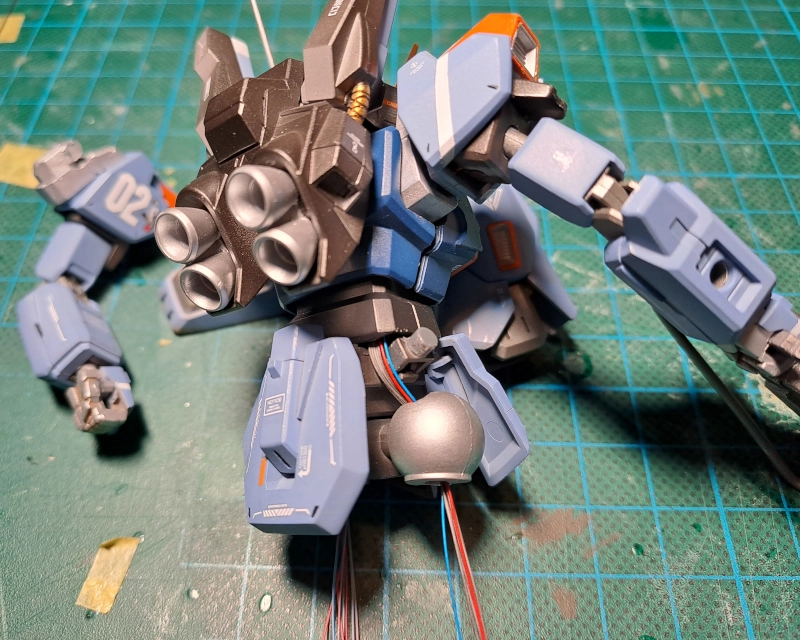
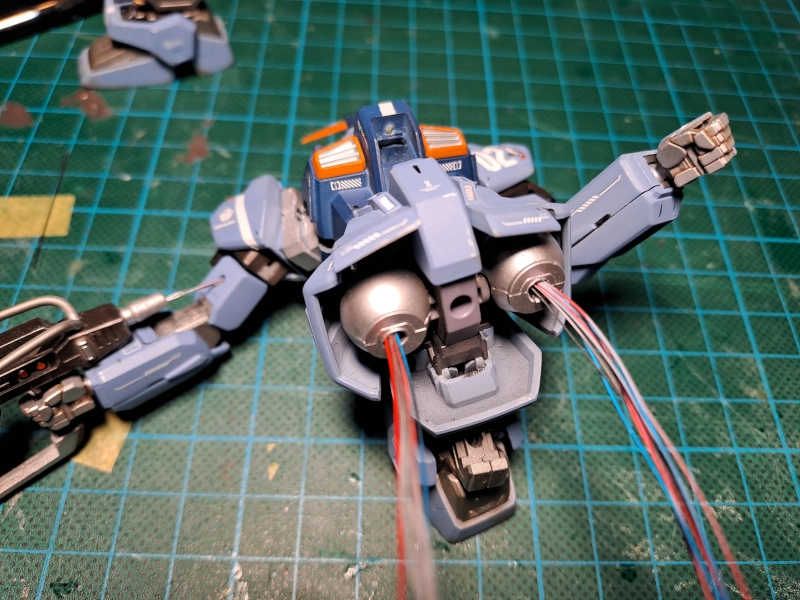
Wiring
I wanted to hide all the wiring, so I had to drill many holes and remove lots of the plastic insides to make this possible. Eventually all wires would come out through the bottom of the feet and through holes in the diorama. The thrusters on the backpack also were provided with LEDs.


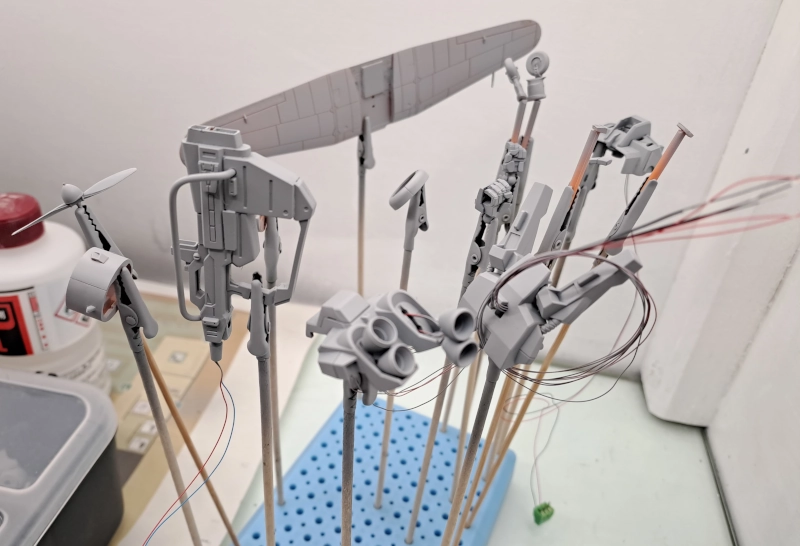
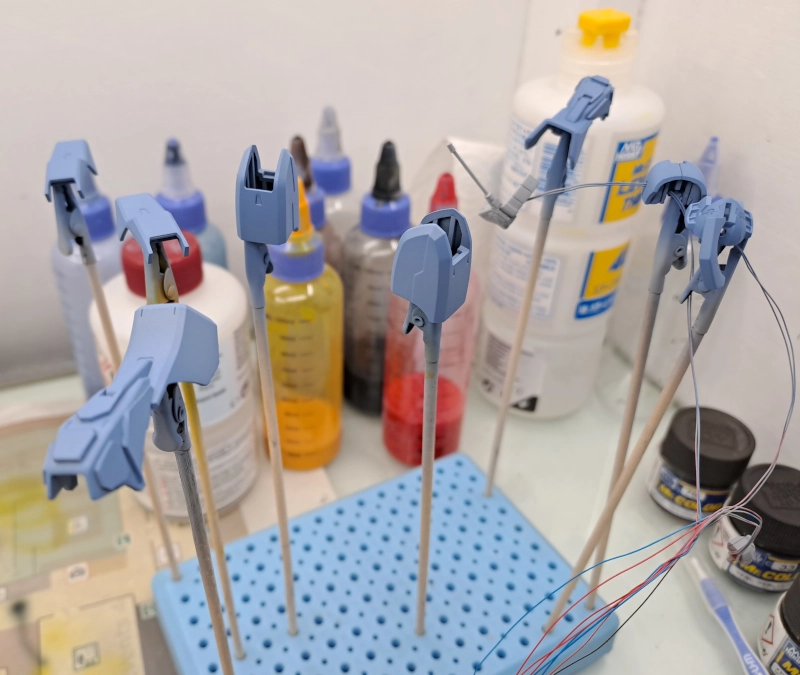
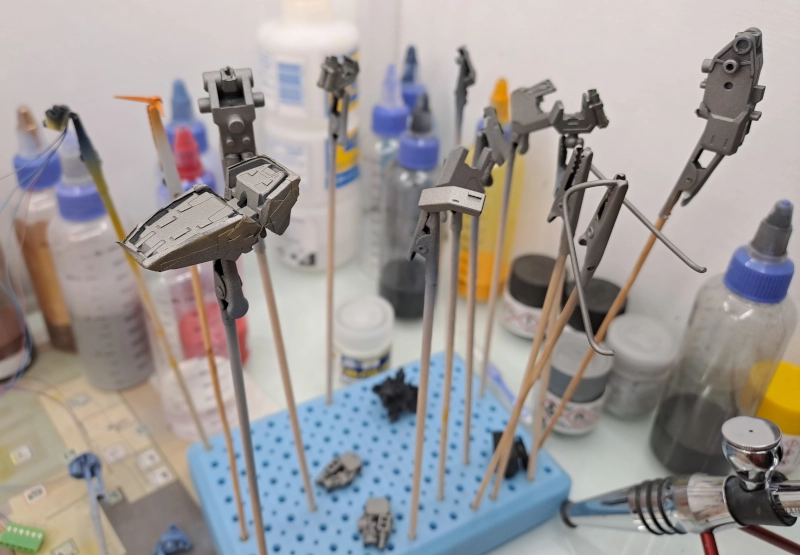
Primer
Now that all the parts were ready, they could be primed with Mr. Surfacer. I covered the eyes with masking tape. I was also working on a Ki-55 airplane at the time.


The masking tape I put over the eyes had to be protected further, so I put a piece of paper over it an taped it further with Tamiya masking tape. In hindsight, it might have been easier to just paint the transparent parts around the eyes with acylic paint and a paint brush instead of using the airbrush.

Paint
Colour scheme
I didn’t want to use the original Titans colour scheme, though the original dark colours did look very cool. Instead I browsed other colour schemes for Gundams and see what I would like. I really liked the ZGMF-1027M Duel Blitz Gundam and the RAG-79-G1 Gundam Marine Type schemes, so I tried a blue with orange scheme, using Mr. Color and Tamiya colours I already had.
In the end, maybe the baby blue didn’t work out too well, it looks to much like a police vehicle rather than a military one. If I had used a grey for the main colour, I think it would have turned out better. I did really like the C78 Mr. Color Metal Black colour.


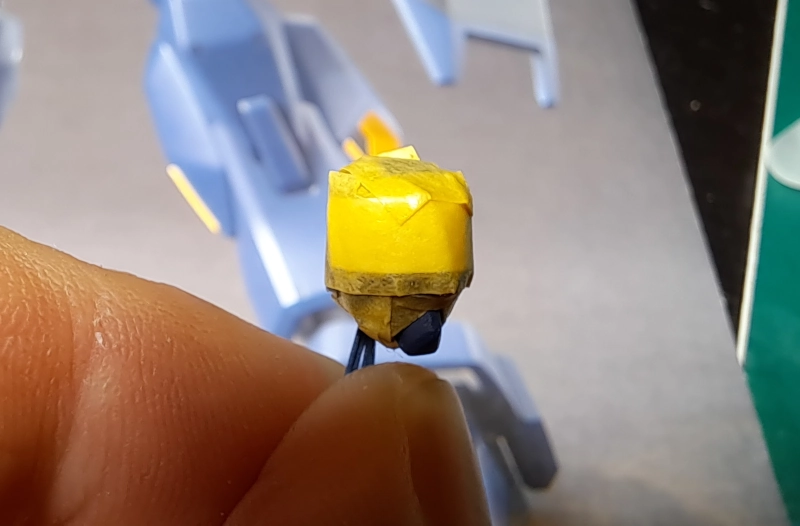
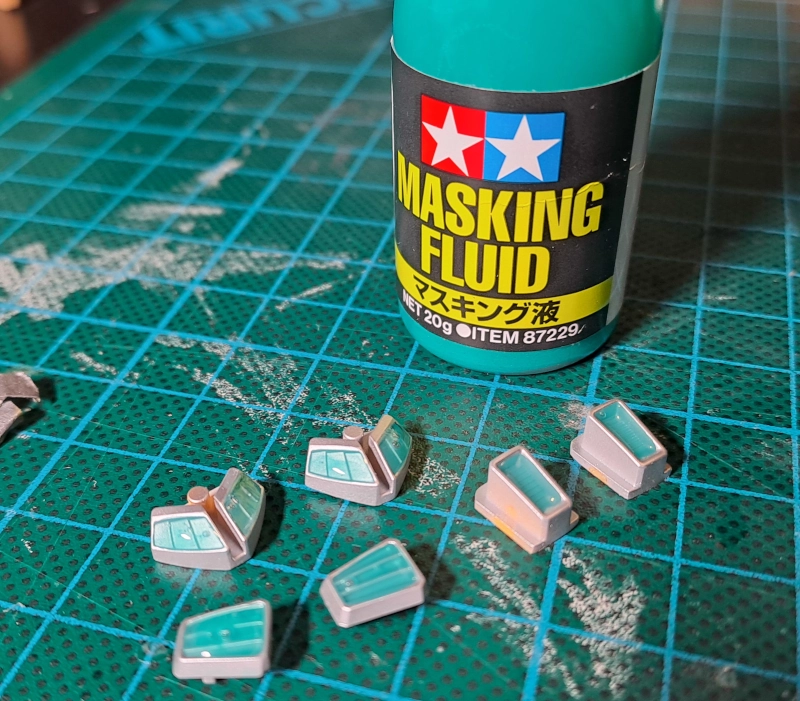
I wanted to paint orange around the vents, so I masked them with Tamiya masking fluid.

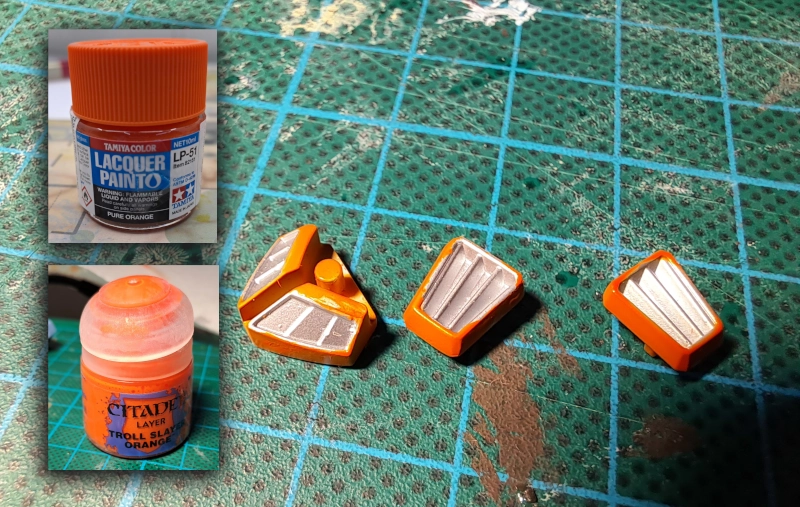
For the orange accents I used Tamiya LP-51 orange, but I had a hard time masking the shoulders, so I used Citadel acrylic Troll Slayer orange paint to paint those parts with a brush. Also my masking fluid covered a bit too much on the vents, so I touched up those parts with acrylic paint as well.

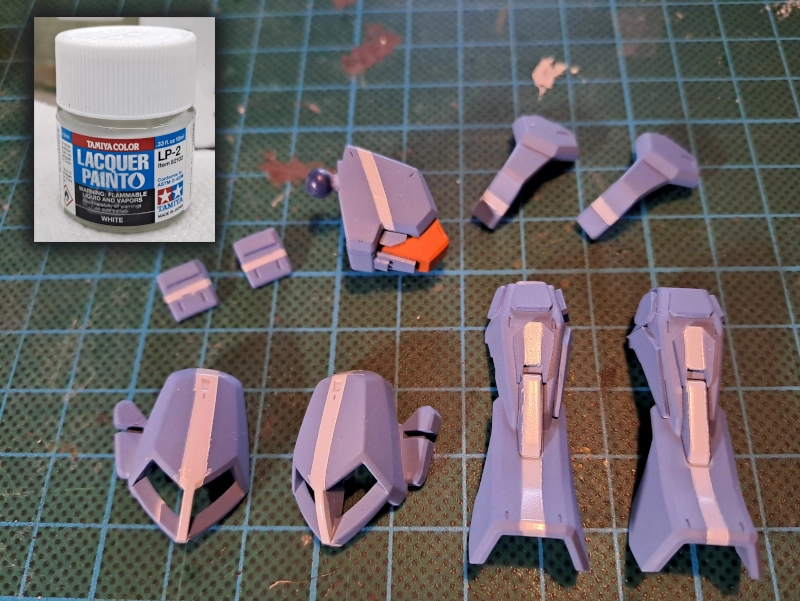
Stripes
Then I prepared the parts for the white stripes. I used Tamiya LP-2 white for this. The final result was a bit messy, sometimes I get underspray where the airbrush slightly lifts the tape and cause paint to be applied on areas where I did not want to.


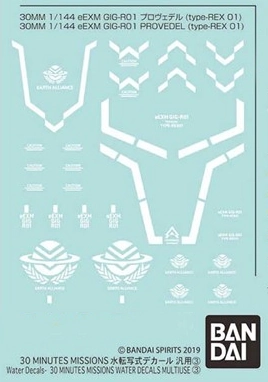
Decals
I used various decals. The “Earth Alliance” ones come from Bandai’s 30 Minutes Missions multi-use 3 sheet, for the Provedel figure.
The grey parrot on the left shoulder is a the symbol of the 322 squadron of the Dutch Royal Airforce. The parrot is named “Polley Grey” and serves as a mascot for the squadron on F-16 Fighting Falcon jets. The squadron’s motto is: “Niet praten, maar doen.” (“Don’t talk, but do.”).
Because this is the second completed figure from the Gundam series I made, after the Kawasaki Zaku II, it gets “02” as its designated number.


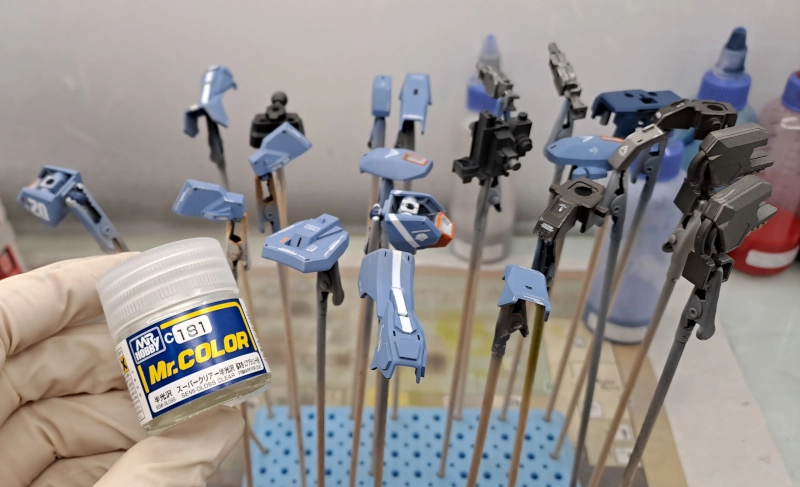
Varnish
After applying the decals, I coated the entire paint with C181 Mr. Color clear coat.

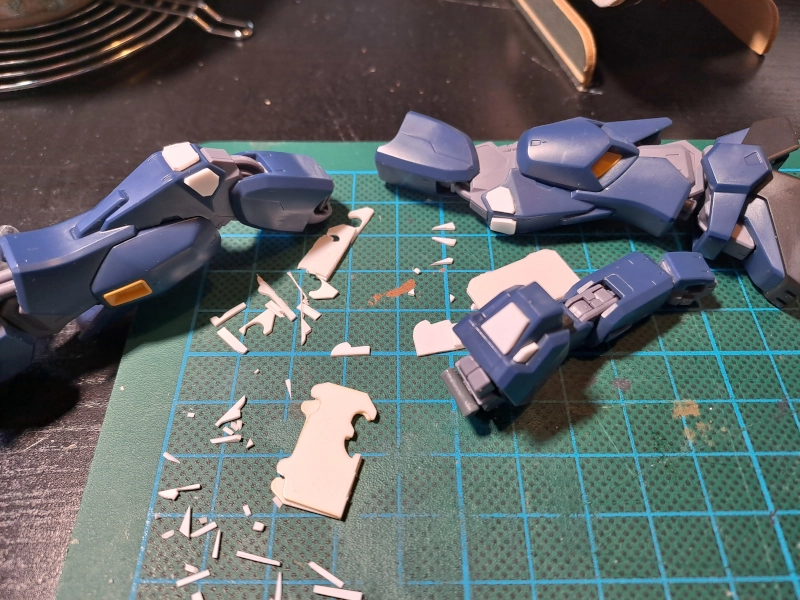
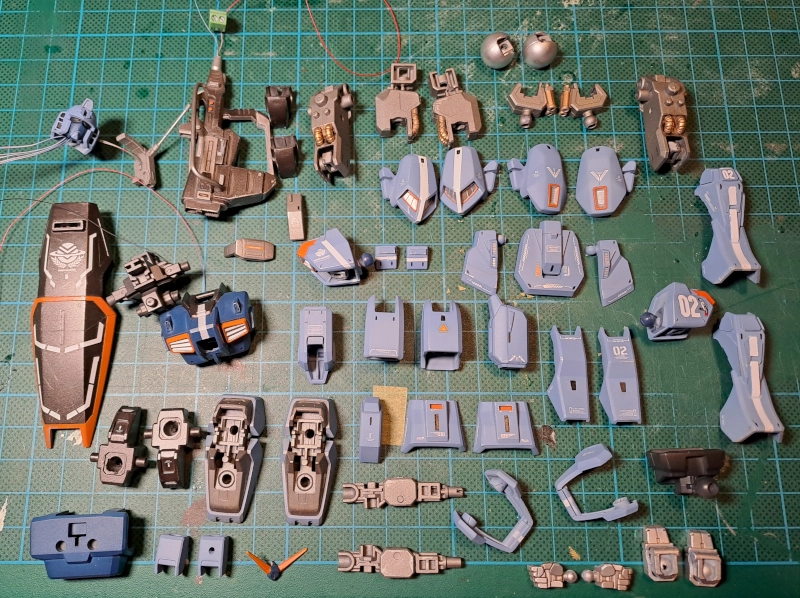
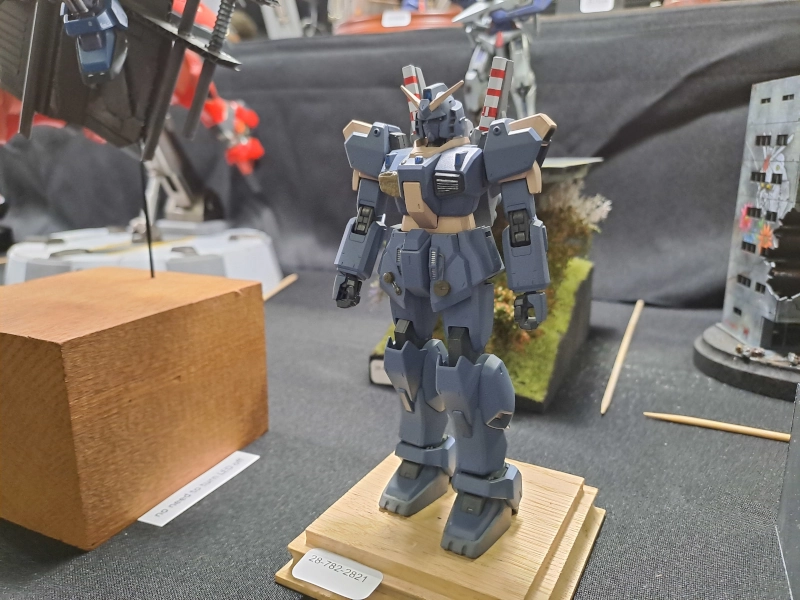
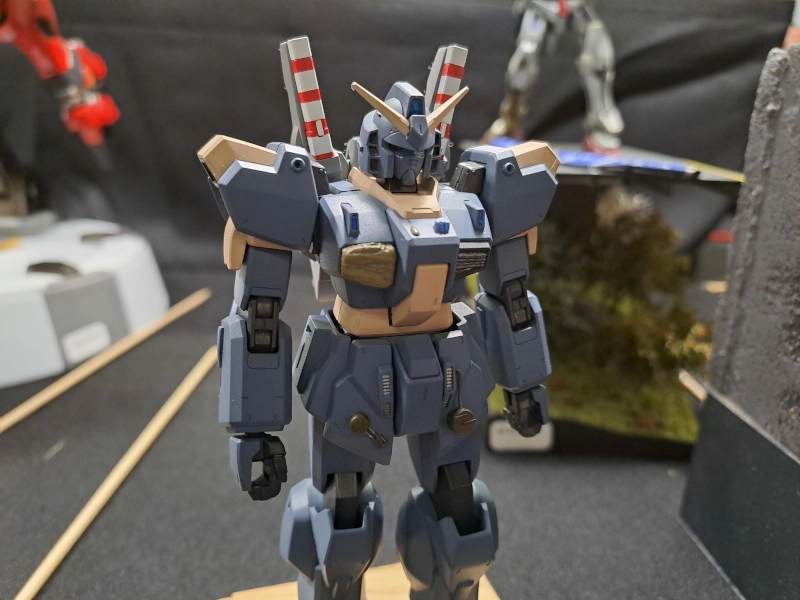
Assembly
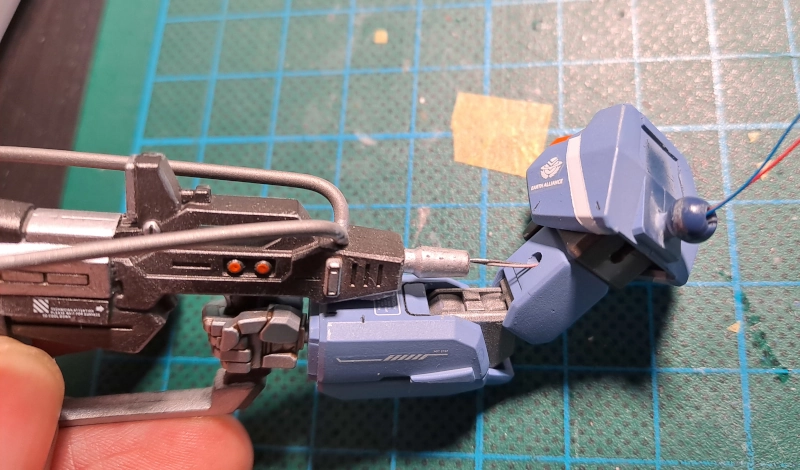
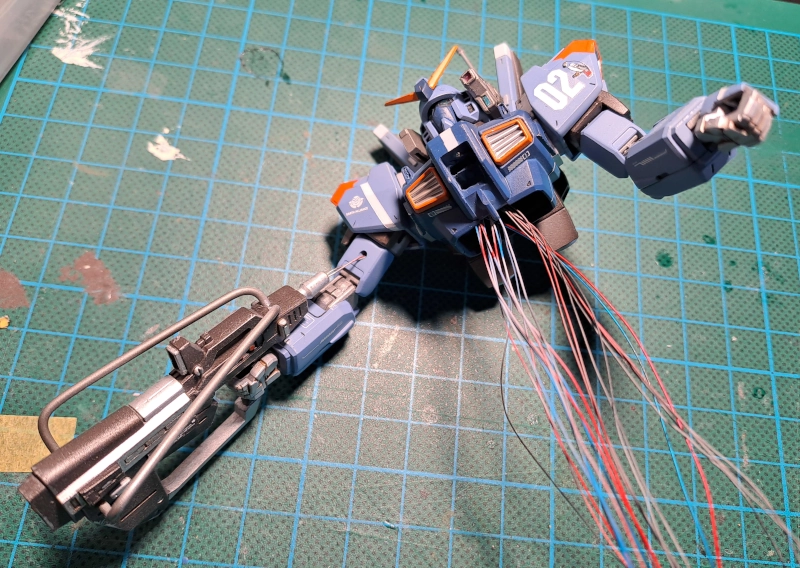
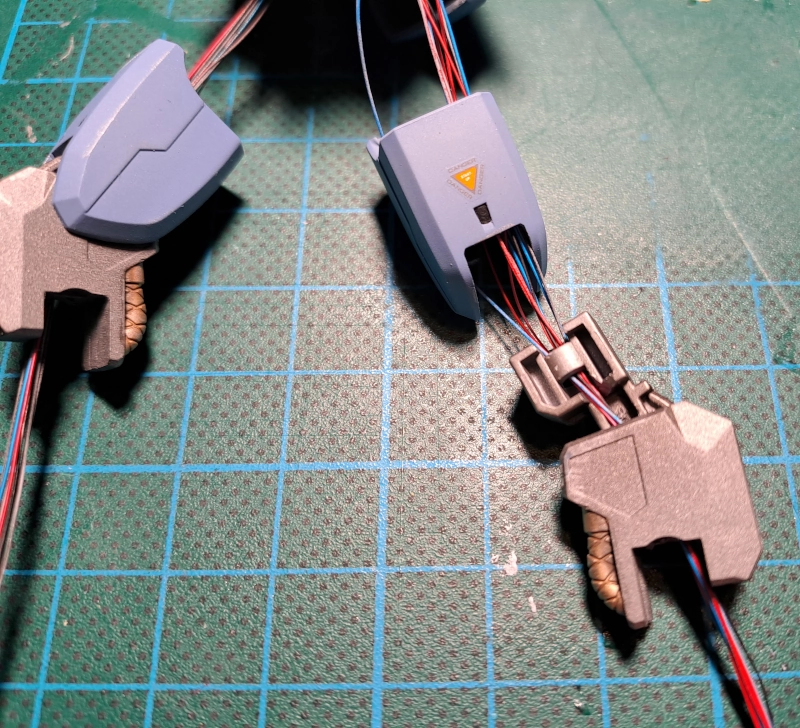
Now that all parts were painted, I could now assemble it. All wires had to be routed to the torso and then trough the waist. Then they were split up into 5 sets of wires, so that each set could go through the legs.
Rifle arm


Torso


Waist


Legs

Feet pistons
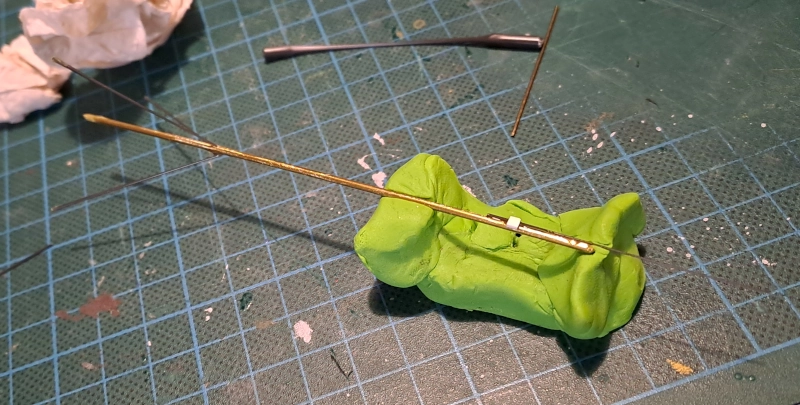
There were little pistons at the foot sections, I drilled some holes and added these brass rods to add a little extra detail.

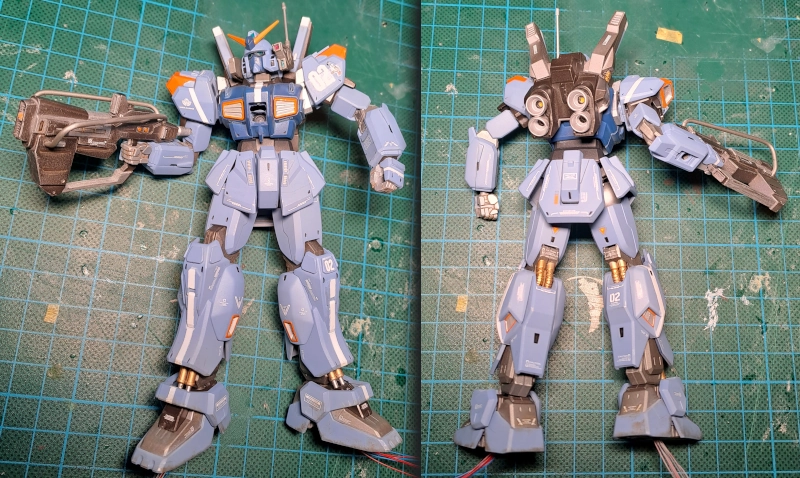
Complete assembly
The Gundam is now completely assembled, which is always a euforic moment. Many hours of work come together to form a complete whole.

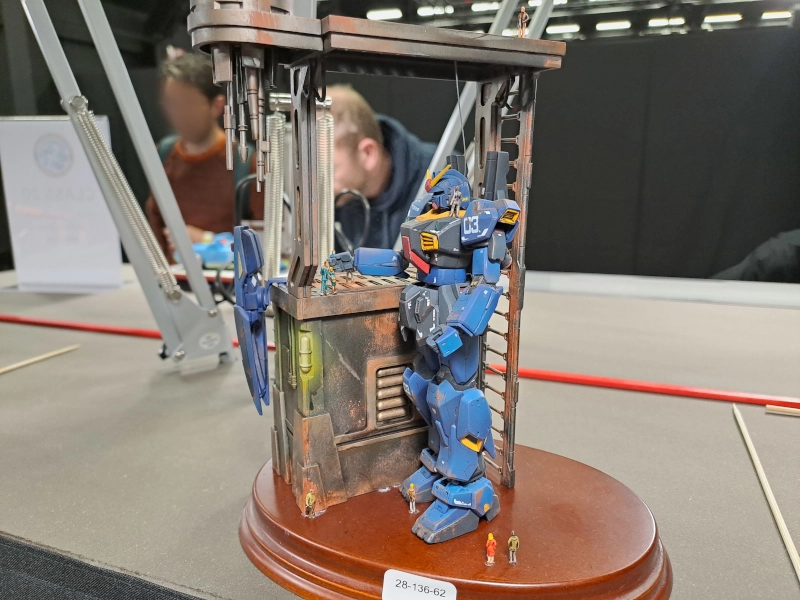
Diorama
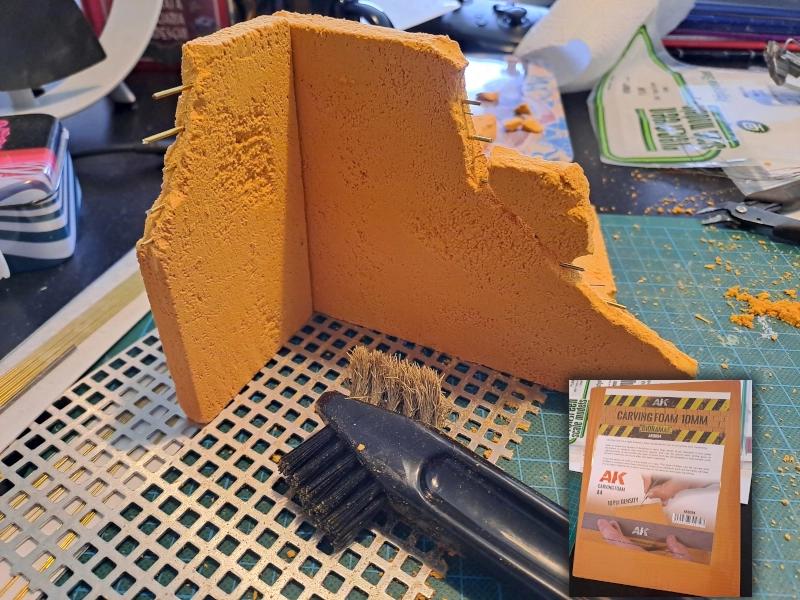
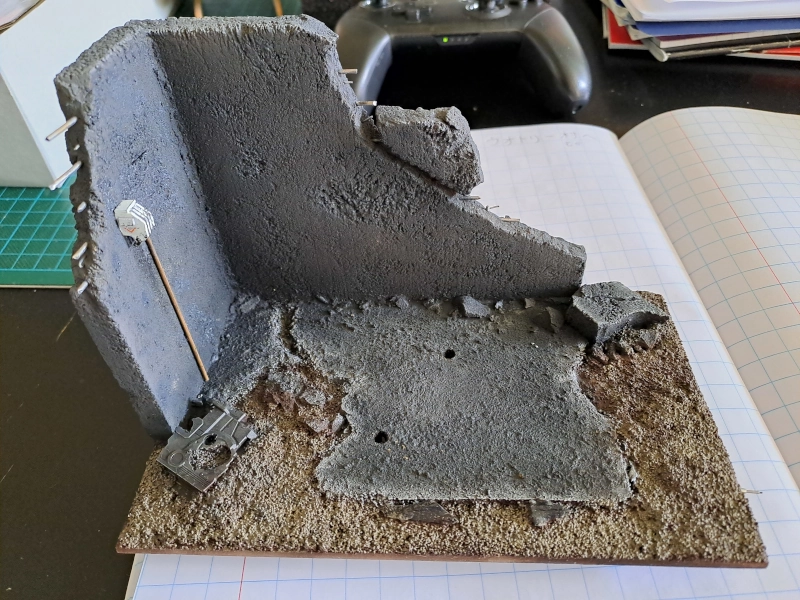
Now to move on and create something for the Gundam to stand on. I am not a good diorama maker, but I have to start somewhere. I used AK’s carving foam to make a beat up wall. And while this foam shapes very nicely, I had some issues with it easily chipping off. And because it is orange, it is very visible. I primed, painted and clear coated it, but it still chips upon touch. I need to investigate if I was doing something wrong with it.

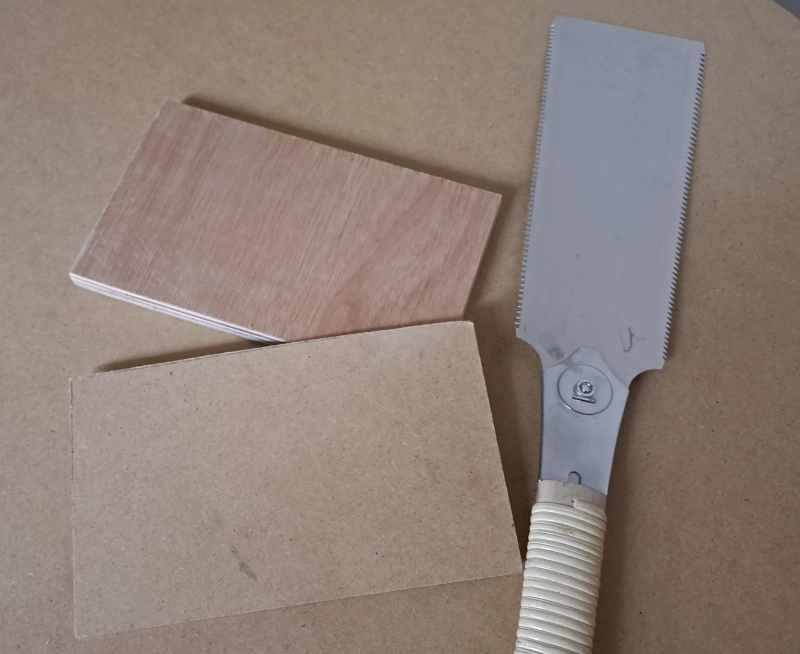
I sawed two pieces of wood, a thicker multiplex piece that would have enough space for screws and hold the electronics. And a piece of MDF, where the diorama and the model would be put on.

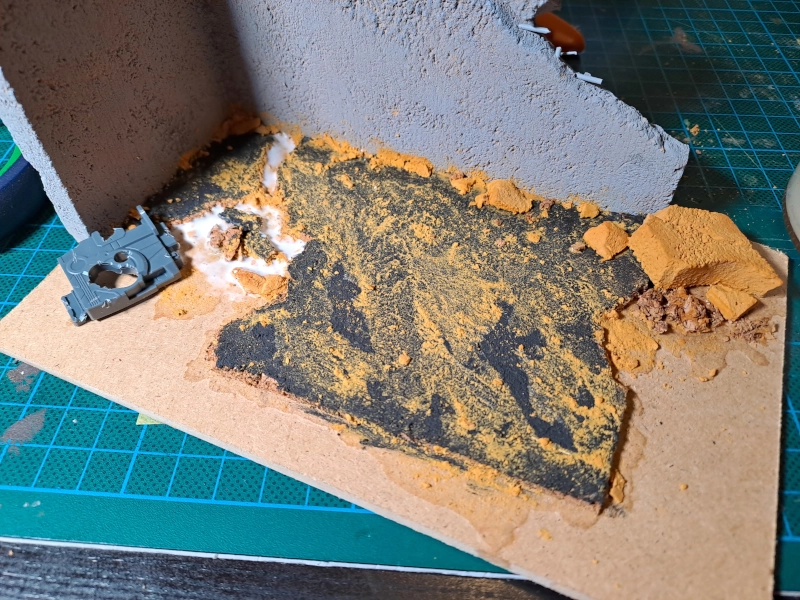
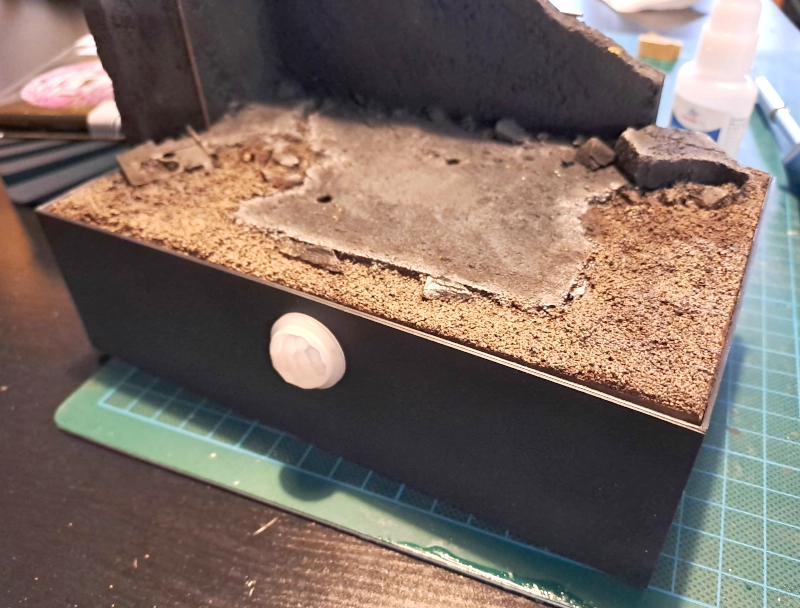
Some more progress on the diorama. I used a cork plate with a layer of AK’s Asphalt texture to give it some a rougher look. Using white PVA glue, I added sand around the place. Slight drybrushing and using washes quickly adds depth to a simple diorama like this.
I also added a little bread clip device on the wall where some black muck come out of. There is also an unused leftover piece from a MG RX-78-2 Version Katoki kit.


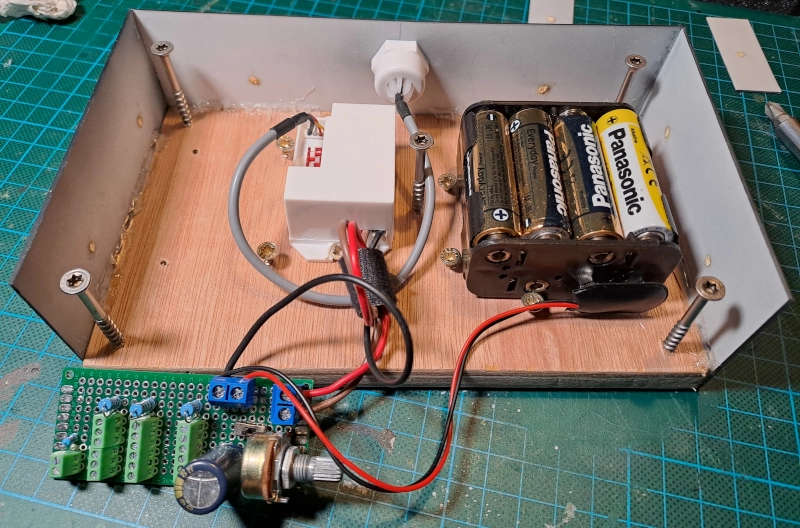
Electronics
I had already made a tester circuit on a breadboard to test the LEDs with a 9 volt battery, to make sure the LEDs work and give the desired effect before glueing them to the plastic parts. I added a decoupling capacitor to make sure the LEDs are provided with a gradual voltage increase on power up and a gradual decrease in voltage when powered down. This gives the effect that the lights do not instantly turn on and off, but fade in and out. It is also better for the LEDs I think.

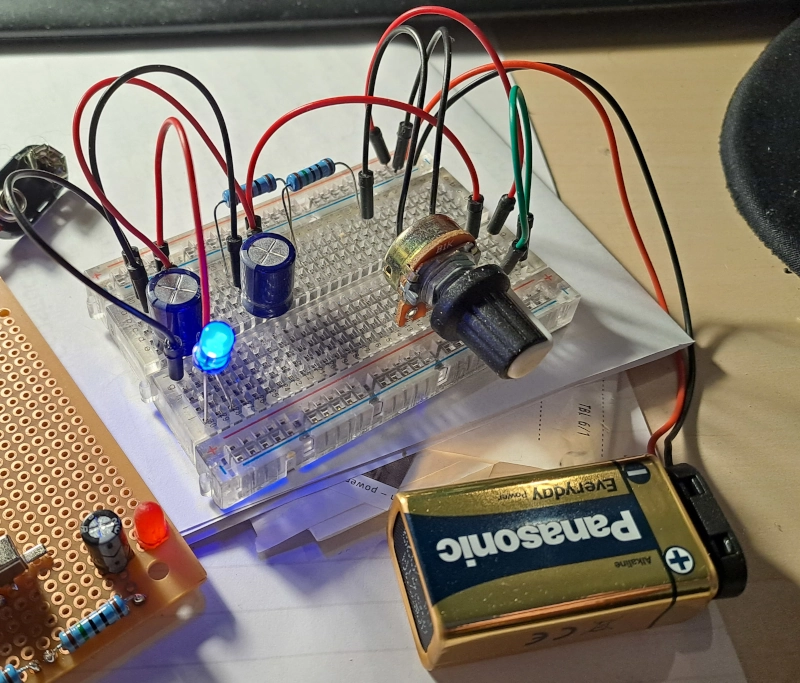
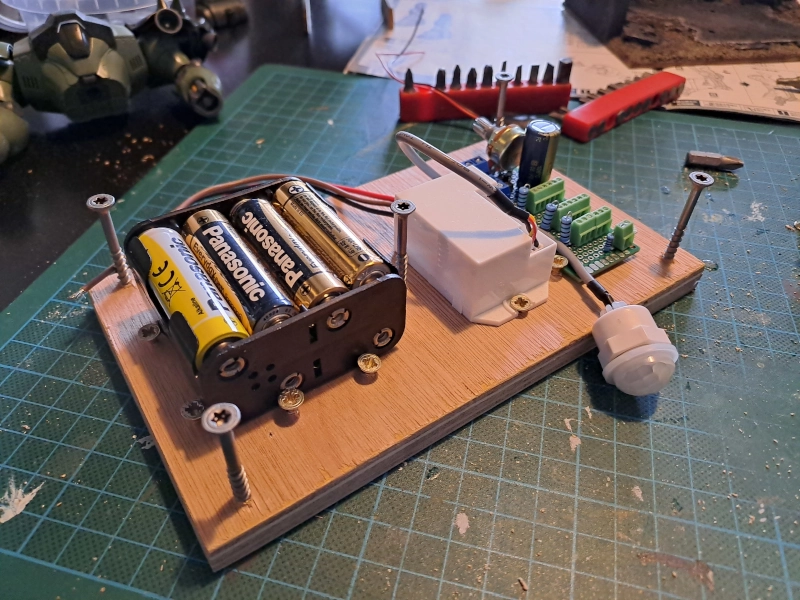
The actual circuit would make use of a PIR (Proximity Infrared) sensor and a 12 volt power source by using 8 AA batteries of 1,5 volt.

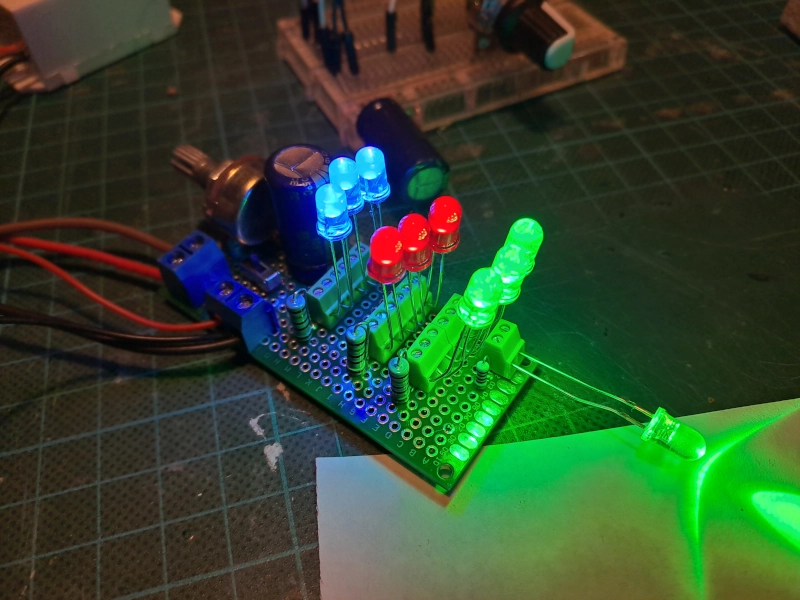
As for the LEDs I used the following:
- 2 green, for the eyes.
- 1 blue, for the camera on top of its head.
- 1 pink, for the vulcan pod attached to the head.
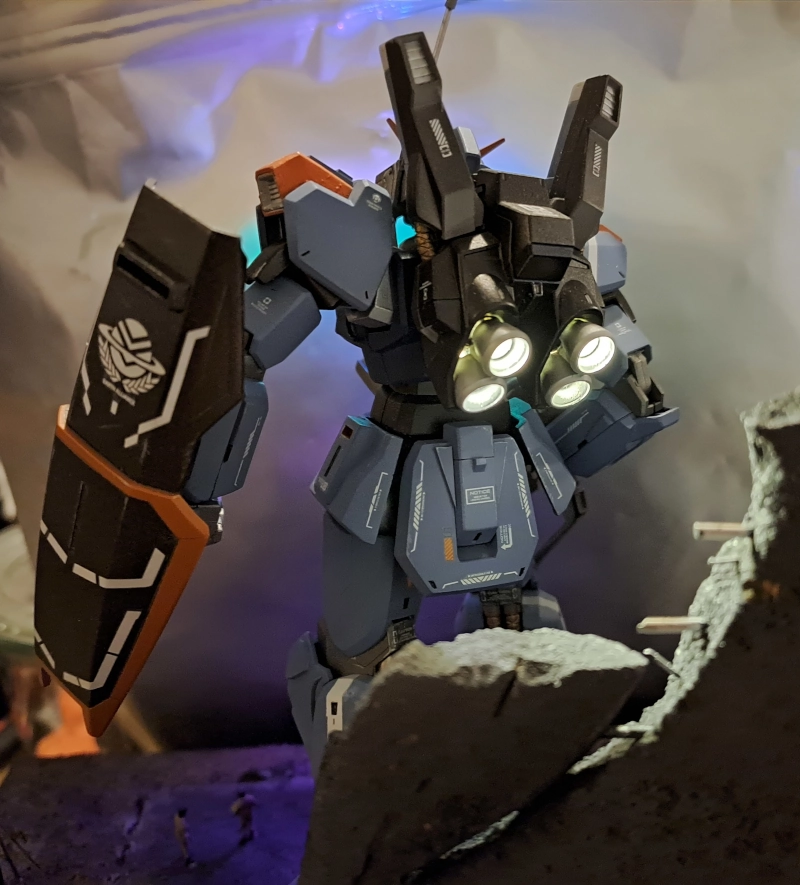
- 4 warm white, for the thrusters on the back.
- 1 pink, for the weapon.
- 1 blue, for the cockpit.
All of these are Miniature Wired LEDs - 0805 SMT LED, by Adafruit. What is interesting about these, is that despite the colours, they all have a forward voltage of 3.2V and a current limit of 20mA specified, which makes it easy for me to combine them in series.
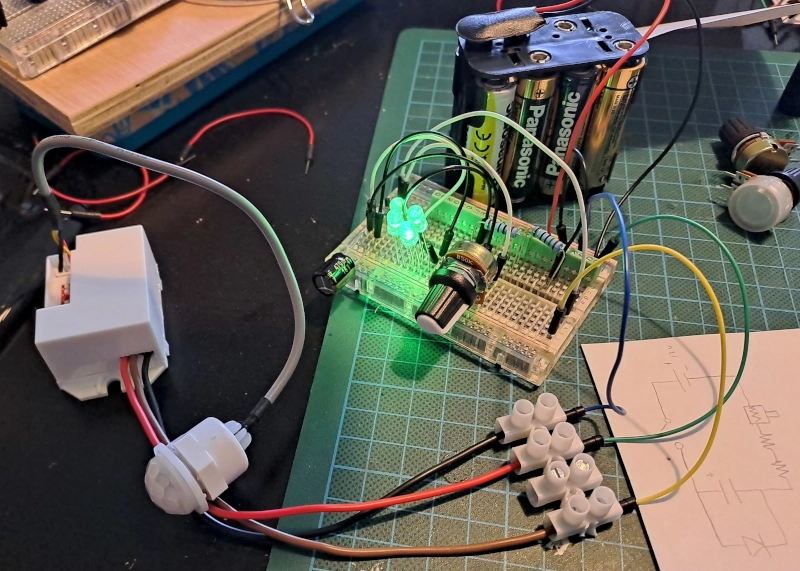
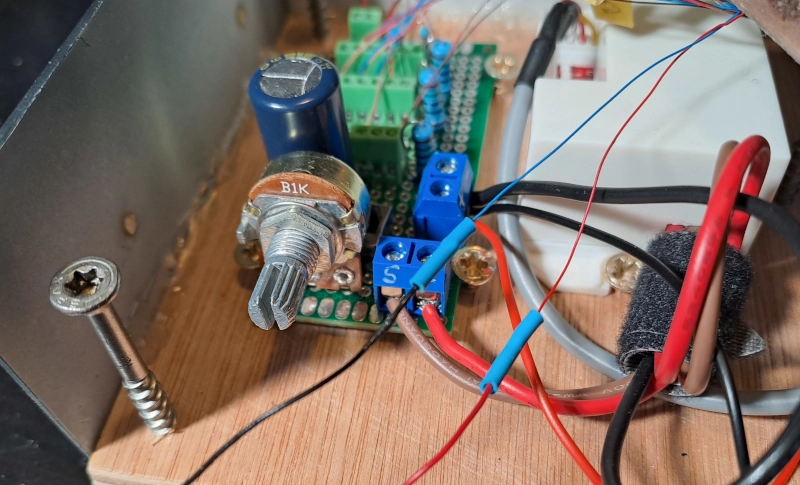
Now that I knew what I wanted, I could use a small perfboard and solder some connectors to it. Those green and blue connectors are called terminal blocks and are ideal for connecting wires. I bought those at the ModelSpoorBeurs event in Weert from a stand called modelbouwled.nl in the Netherlands. This place has a lot of material related to the train hobby, including these very useful electronics. The decoupling capacitor is a Panasonic 16 volt, 2200μF capacitor. And finally a little toggle switch and a 1KΩ potentiometer in parallel to slightly alter the brightness to my liking.

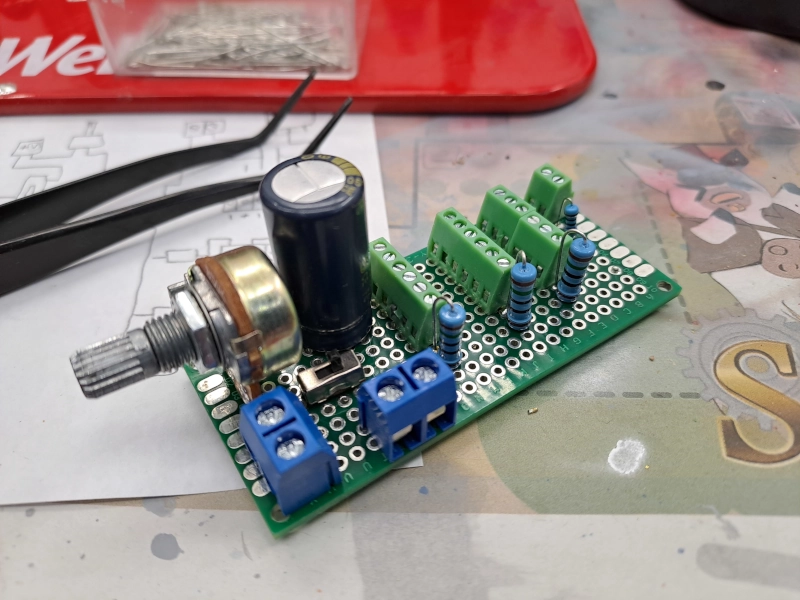
Of course this board also had to be tested with some LEDs.

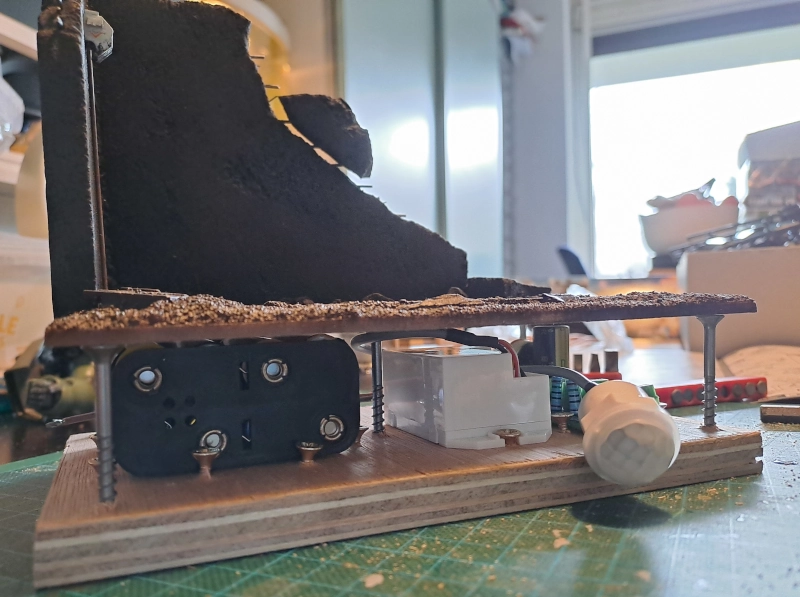
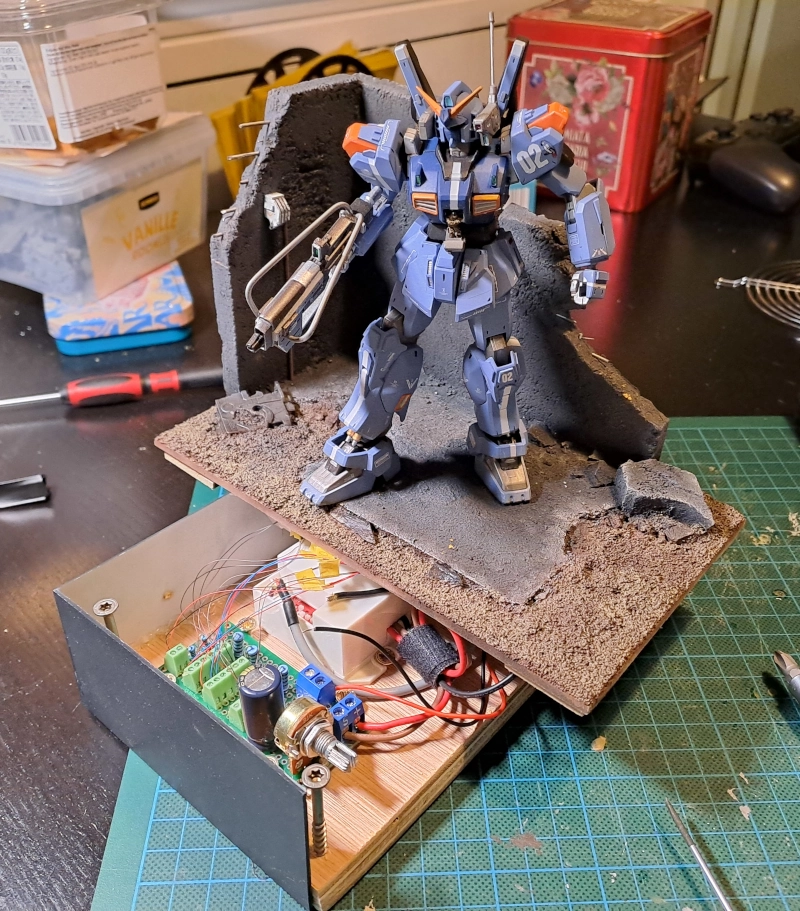
A simple way to attach the electronics is to screw them in the wood. If I want to re-use these parts for a new model, I can easily take it apart.

Those larger screws in the corners and middle of the wooden board are to balance the diorama on top. This is very convenient, as you can just screw it in deeper to make adjustments.

Frame
To hide the electronics, I cut some plastic pieces from Evergreen Scale Models plate with a Tamiya Scriber. To prepare them for airbrushing, it helps to cement some pieces of sprue on the back, so that they can be easily clipped. The backsides will not be visible later.

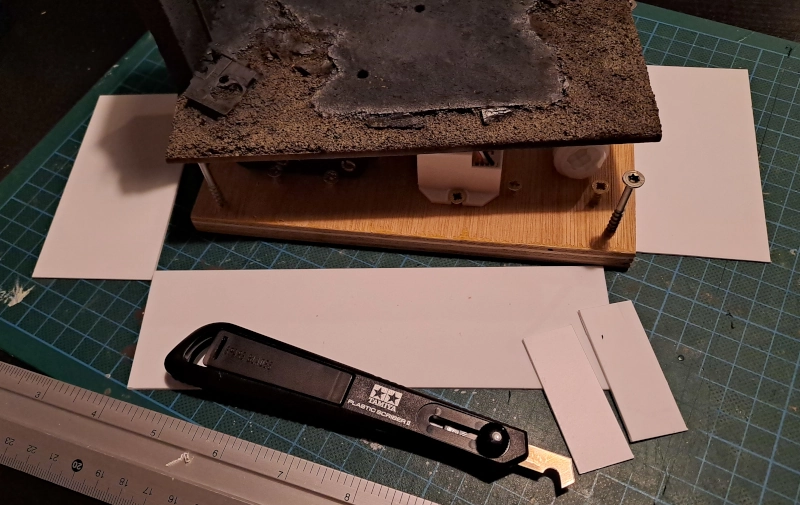

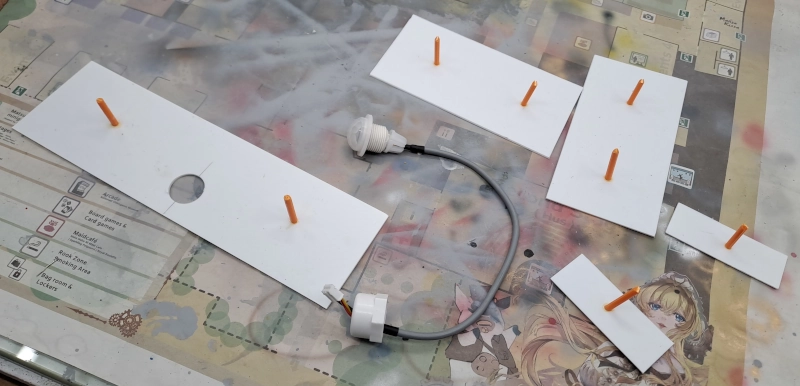

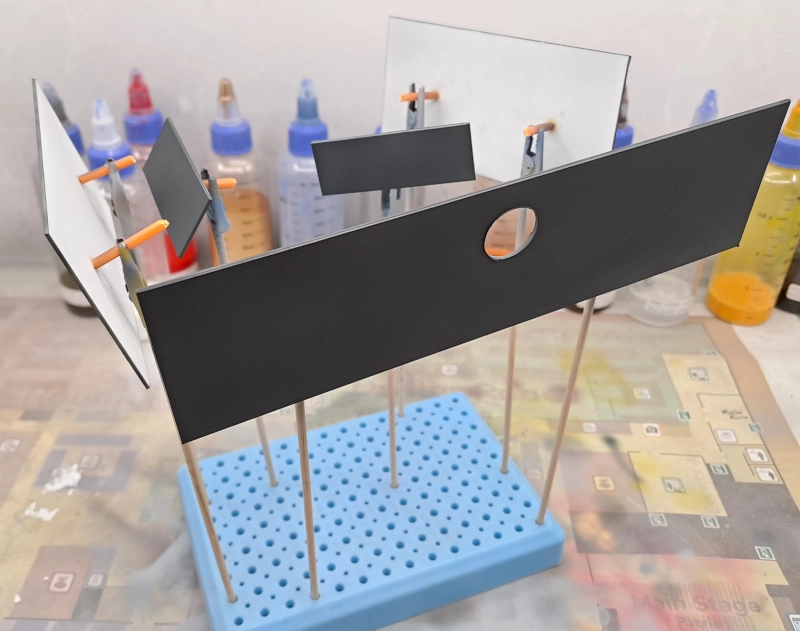
With the frame painted, it could now be attached to the wooden board. I used CA glue for this, along with some hot glue. Though I am not sure how effective the hot glue will hold hold it to the wood, it might just help a bit. I did score the plastic with a knife before attaching, basically adding lots of deep scratches. This helps the CA glue to grip a little more onto the plastic. It turned out pretty sturdy, so I think this worked well. I did not use the two smaller plates, it was easier to remove the top diorama this way and it made it less noticable that the lowest wood piece was not symmetrical.


Completing the model
With the box complete, I could now attach the Gundam to it and connect the wires underneath. It turned out the wires for the rifle were just too short, so I extended those by soldering additional wire and sealing it with a heatshrink.


I wanted to add something more to the diorama, so I created a field antenna and added some more soldiers. Especially these soldiers help add scale to the whole Gundam, because my diorama does not help. The wall is huge, so at least now it is easier to get an impression of the scale.


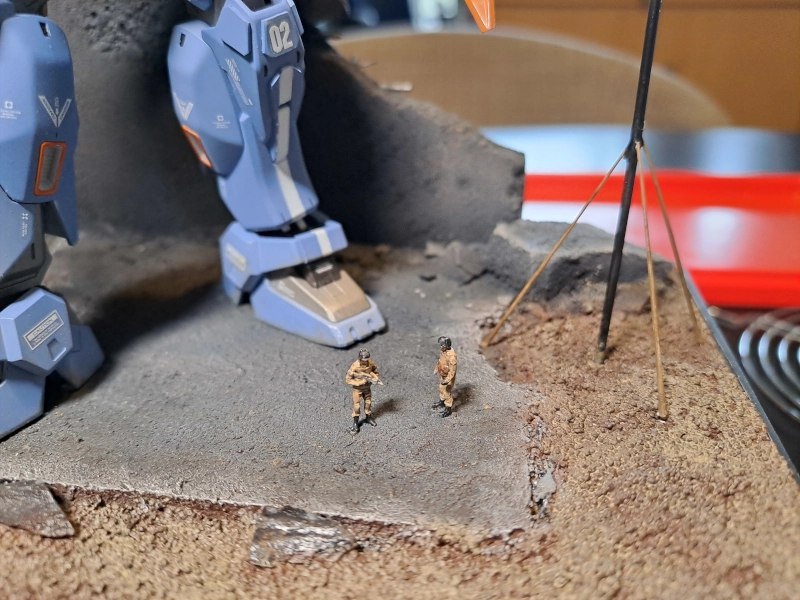
And another moment of euforia, is to finally see all those LED’s turn on, to see my work paid off in the end. Although, those warm-white LED’s give it a bit of a desk lamp feeling, I think I should have used orange there instead.

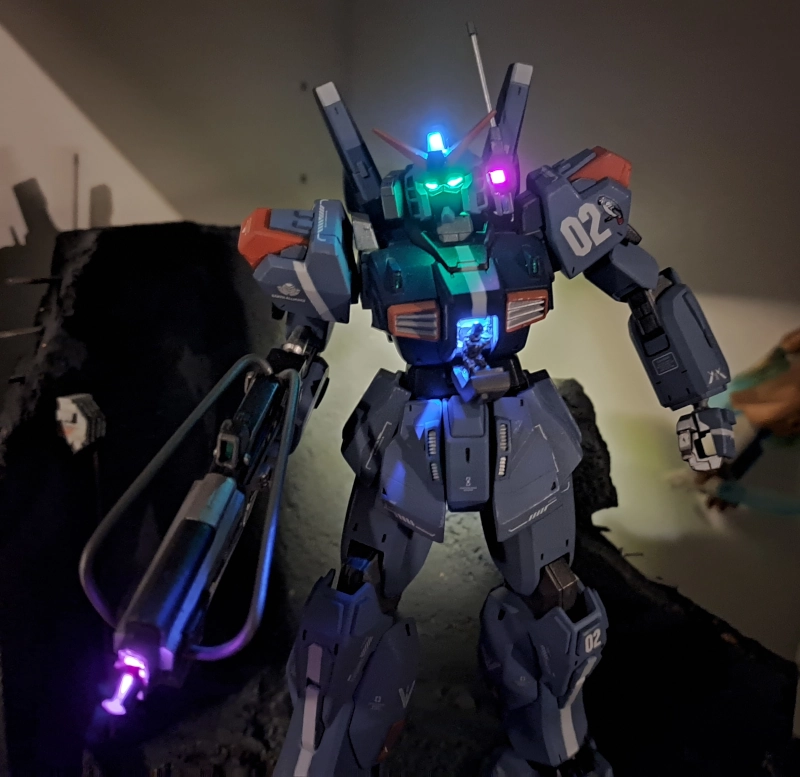

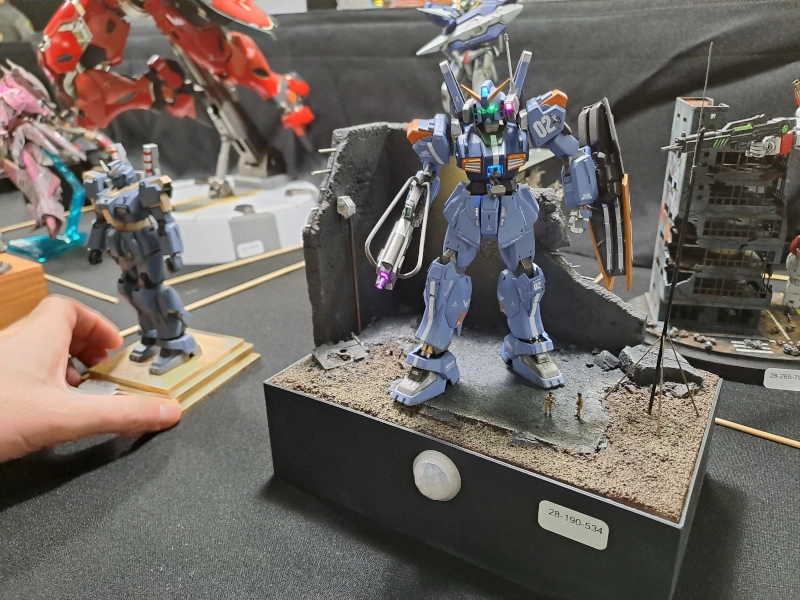
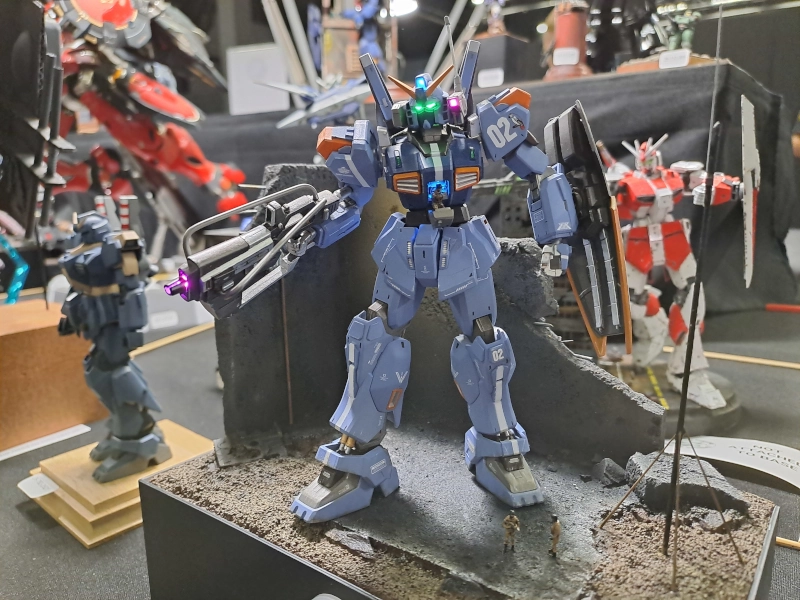
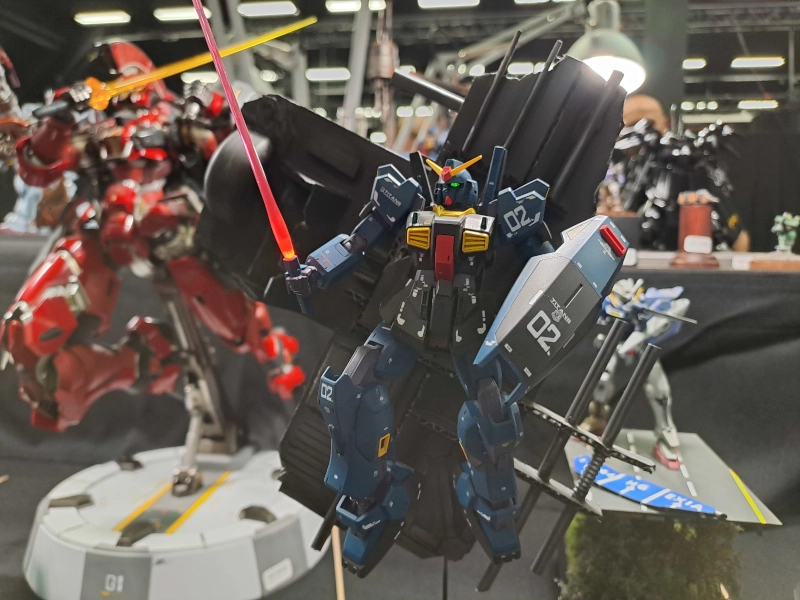
Scale Model Challenge 2025
I entered the Gundam in the SMC competition in Veldhoven, the Netherlands. But sadly it did not win any prizes, which is to be expected of my very first entry. Maybe next time I can present better work.
I participated this Gundam along with 3 other RX-179 Mark. II Gundams made by other members of SIG Plamo.
You can view more photo’s of the event in my post here: SMC 2025.


Back to plamo kits